Table of Contents
By default, only dates and time are shown in Windows task bar. There is no seconds with it. However, sometimes we need to see the seconds for convenience, is there any way to show seconds in System Tray clock on Windows 11?
![]()
According to online tutorials, you can turn on this options by going to:
Settings -> Personalization -> Taskbar -> Taskbar Behaviors -> Show seconds in system tray clock.

Unfortunately, this option is not available on my laptop with Windows 11 Pro (22H2, Build 22623.1325).
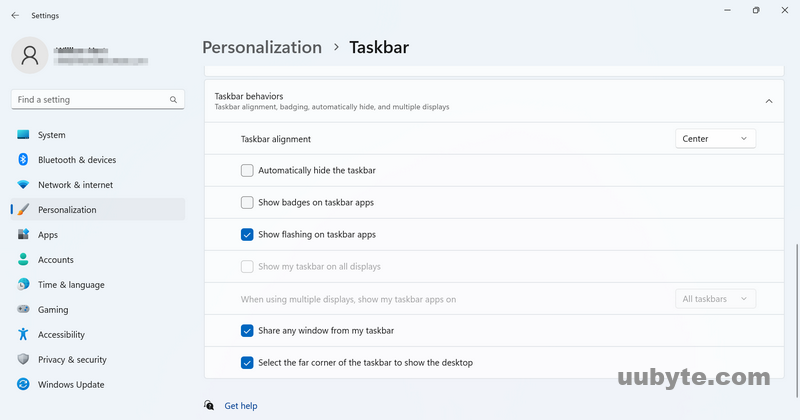
So what is the right way to show seconds in Windows Taskbar? We will introduce four different tricks to complete this task.
Method 1: ElevenClock (Free)
ElevenClock is a dedicated free app for Windows 11 clock customatization. It has all the features you need for advanced clock settings in Windows 11, which Microsoft refused to provide in Windows 11.
The process to show seconds in Windows 11 with ElevenClock is quite straightforward.
Step 1: Download and install ElevenClock from this link:
https://www.majorgeeks.com/files/details/elevenclock.html
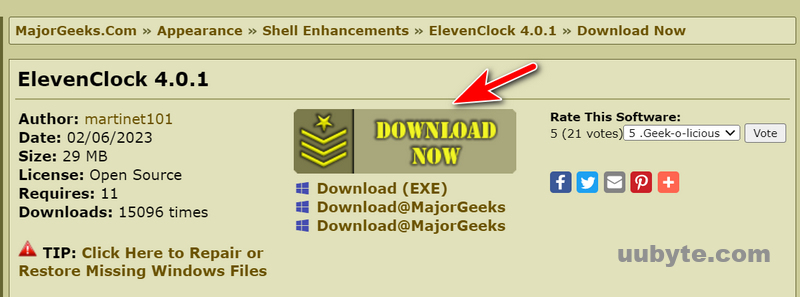
Step 2: A restart is required before running this app on Windows 11.
Step 3: Open ElevenClock app form system tray as it automatically starts with Windows 11 OS.

Step 4: Go to Clock Settings and click on it to unfold the options.
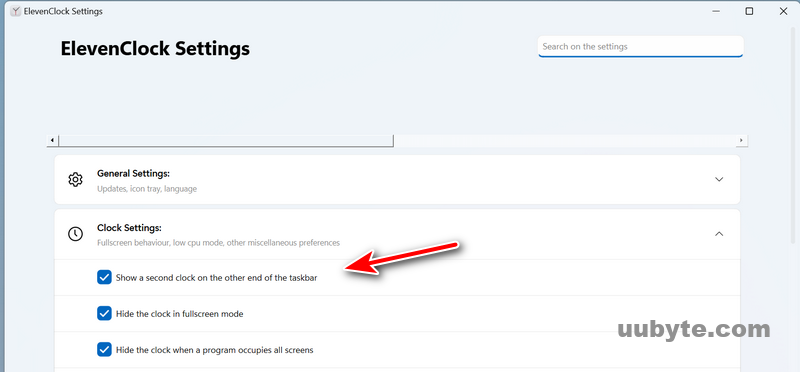
Step 5: Check Show a second clock on the other end of the taskbar. Now, you will see seconds in Windows 11 taskbar.

Method 2: Stardock Star11 App ($5.99)
Stardock Start11 is a software program designed to bring the classic Start Menu experience to Windows 11. As Microsoft introduced a new Start Menu design in Windows 11, many users who were accustomed to the traditional Start Menu found it difficult to navigate and access their programs quickly. Start11 aims to solve this problem by offering users a customizable Start Menu that resembles the classic Windows 7-style Start Menu.
With Start11, users can customize the appearance of their Start Menu, including the color, transparency, and font. They can also add their favorite apps, folders, and shortcuts to the Start Menu for easy access. Users can choose to display the Start Menu as a traditional list, or they can use the enhanced mode, which displays apps in a more graphical format.
Here are the steps to let you show seconds in Windows 11 taskbar:
Step 1: Download Startdock Start 11 from their website and install this app on Windows 11.
Step 2: Click the Start 30 Day Trial button when the app is launched and enter an Email address for account verification.
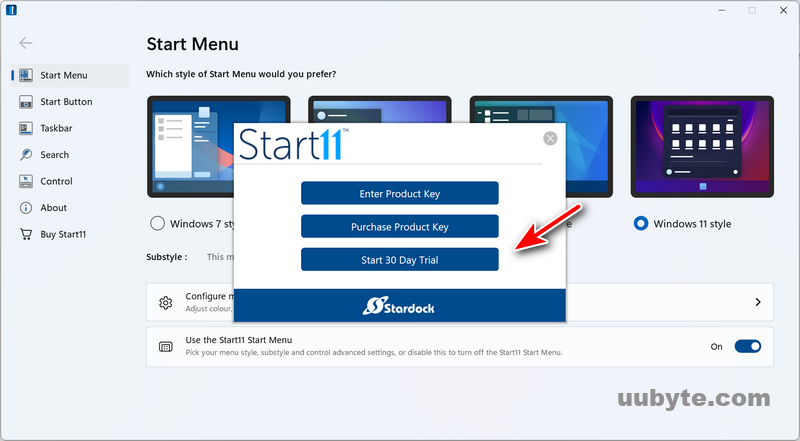
Step 3: You will receive a confirmation email and click the link to activate this free trial account. After that, you can use the app normally.
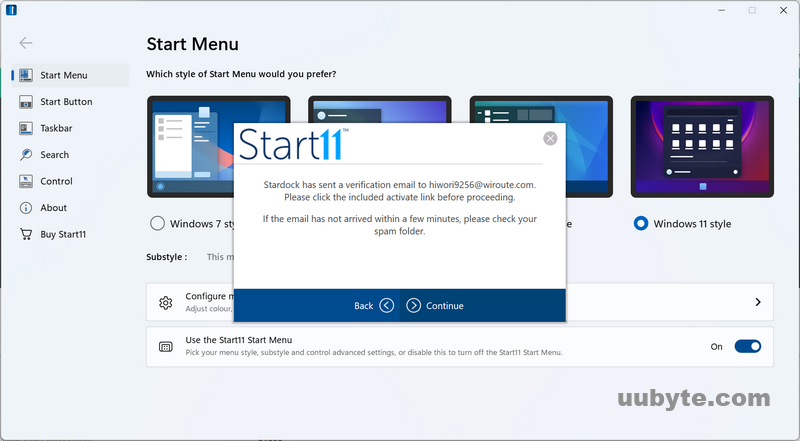
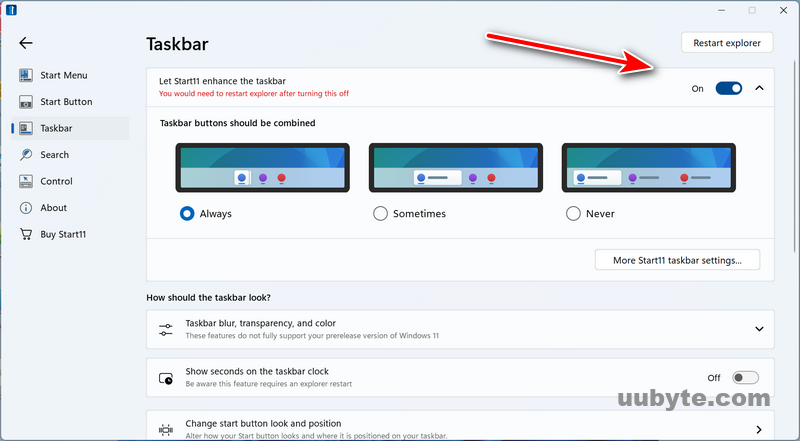
Step 4: Once the app is opened, move to the Taskbar menu located at the left sidebar and turn on the option that says Let Start11 enhance the taskbar. You need to restart the explorer to make this change into effect.
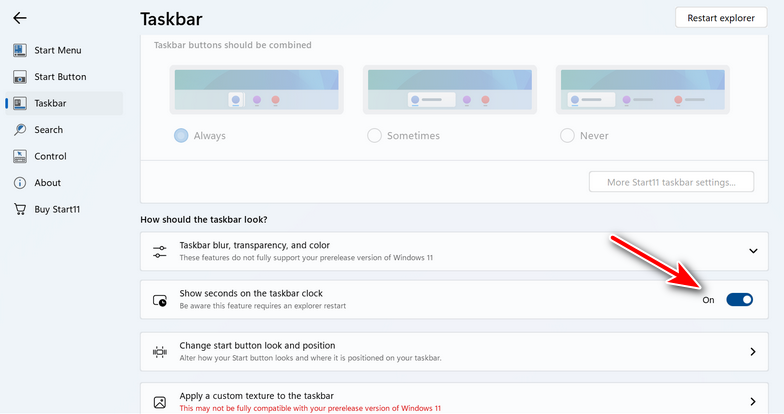
Step 5: Scroll down to the window and turn on Show seconds on the taskbar clock. After that, you need to restart the explorer again.
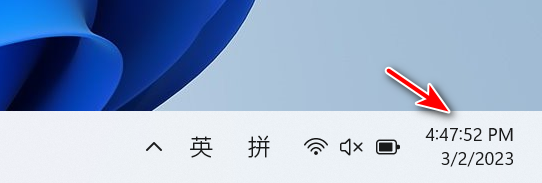
Step 6: Now, you can see the seconds are showing in Windows 11 taskbar.
Method 3: Edit Windows 11 Registry
The Windows registry is a hierarchical database that stores configuration settings and options for the Microsoft Windows operating system. It contains settings for hardware, software, and user preferences.
The registry is organized into five main sections called categories. Each category is organized into a tree structure, with sub keys and values that contain the actual configuration data. Keys are like folders that contain values, which are like files that store configuration data. Keys and values can be added, deleted, and modified using the Registry Editor.
You can now modify the registry key in Windows 11 to show seconds in system tray clock.
Step 1: Open a text editor, create a new file and paste the following content into it:
Windows Registry Editor Version 5.00
[HKEY_CURRENT_USER\Software\Microsoft\Windows\CurrentVersion\Explorer\Advanced]
"ShowSecondsInSystemClock"=dword:00000001
Step 2: Save the file as show_seconds.reg.

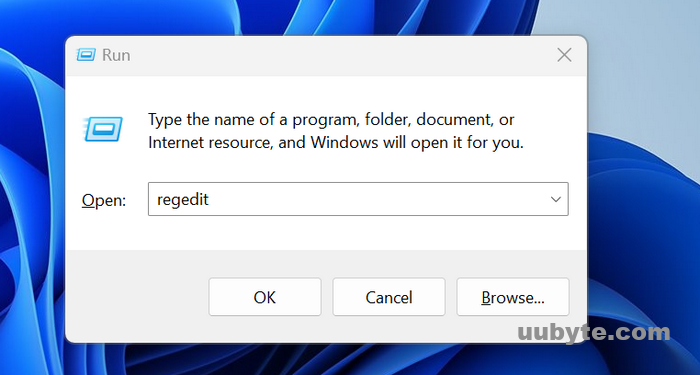
Step 3: Press the Windows key + R on your keyboard to open the Run dialog box. Type "regedit" in the Run dialog box and press Enter. If you see a User Account Control prompt, click Yes to continue.The Registry Editor window will open.
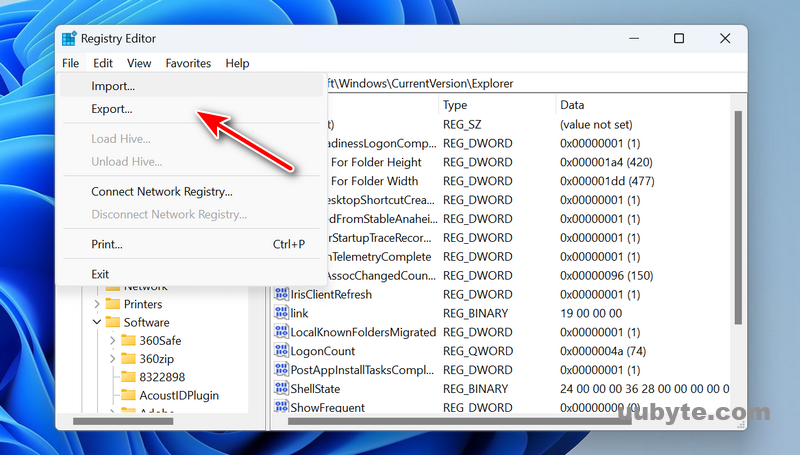
Step 4: Click File -> Import to load the reg file into Registry Editor. Wait a seconds and you will see there are seconds showing in Windows 11 taskbar.
It is important to be careful when editing the registry, as incorrect changes can cause system instability or even prevent the system from starting up. It is recommended to backup the registry before making any changes and to only make changes if you know exactly what you are doing.
Method 4: Enroll in Windows 11 Insider Program and Install Dev Build
According to tech report, The Dev Build has a default option for showing seconds in Windows taskbar. However, you should first enroll into Windows Insider Program, which is free and requires a Microsoft account to proceed.
Step 1: Go to the Windows Insider Program website and click on the user icon to get started.

Step 2: Sign in with your Microsoft account credentials. If you don’t have a Microsoft account, you can create one by clicking on the "Sign up" button.

Step 3: Once you’re signed in, select "Dev Channel" from the list of Insider Channels and click on the "Confirm" button.
Step 4: Read and accept the terms of the Windows Insider Program agreement, and click on the "Submit" button.
Step 5: Open the Settings app on your PC and navigate to "Update & Security" > "Windows Insider Program".
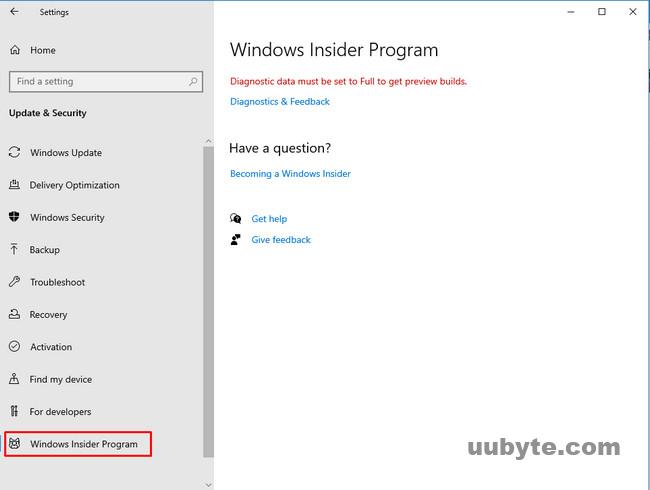
Step 6: Click on the "Get started" button and link your Microsoft account to your PC.
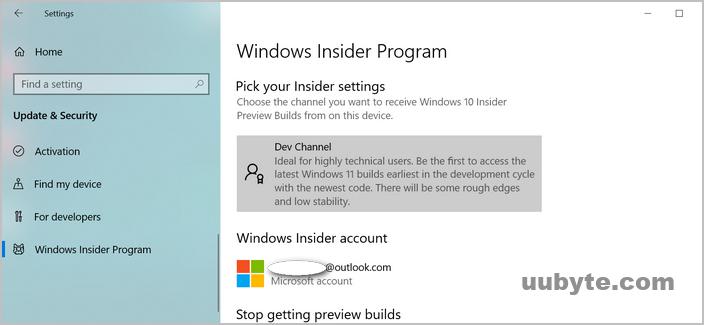
Step 7 :Choose the "Dev Channel" option and click on the "Confirm" button.
Step 8: Restart the Windows 11 PC to apply the changes.
Step 9: After reboot, open the Settings app again and navigate to "Update & Security" > "Windows Update".
Step 10: Click on the "Check for updates" button, and wait for the Dev build to download and install. When this is completed, Windows 11 is able to show seconds in taskbar at this time.
Note: It’s important to remember that Dev builds are early releases of Windows and may contain bugs and issues that could affect the stability and functionality of your PC. It’s recommended that you backup your important files and data before installing a Dev build, and be prepared for potential issues.