We see a lot of negative feedback of Windows 11 24H2 and people are looking for a way to roll back to 23H2. Unfortunately, Microsoft only provides download for Windows 11 2H2. Don’t worry, we will help you create a bootable Windows 11 USB for 23H2.
Among the various tools available, UUByte ISO Editor stands out as a powerful and user-friendly solution for creating Windows 11 installation USB, especially tailored for the 23H2 update. This guide explores why UUByte ISO Editor is the optimal choice for this task, highlighting its features, ease of use, and the advantages it offers over other software options.
Part 1: Download Windows 11 23H2 ISO Image
Besides the Microsoft website, there are a couple of reliable and trustworthy websites for hosting Windows ISO archives. You can download the old Windows 11 23H2 from the above sites. One good example is OS.Click.
Step 1: Open a web browser and visit https://os.click.
Step 2: Scroll down the page a little bit and click the download option ‘Windows 11’.
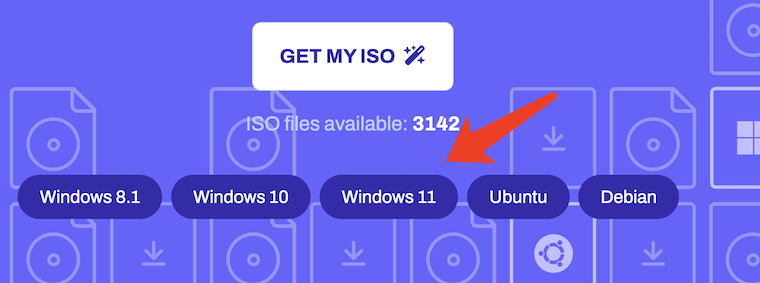
Step 3: From here, all supported and discontinued Windows 11 versions are available. Proceed with 23H2 at this time.
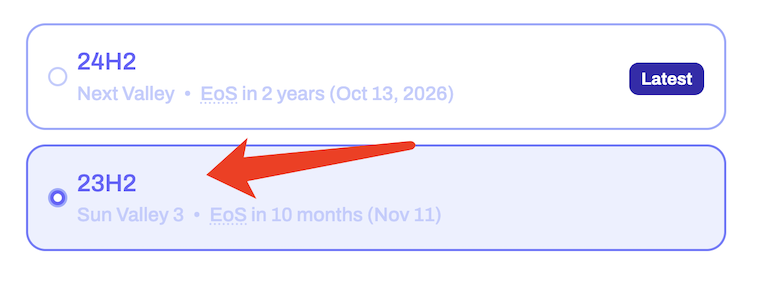
Step 4: Choose, an OS build, language, architecture. Finally, there will be a download for Windows 11 ISO.
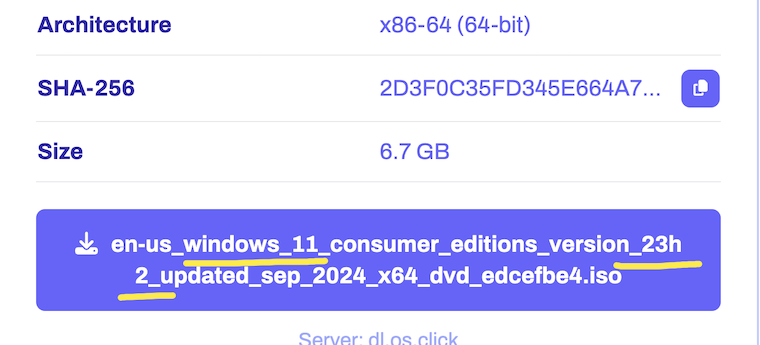
Part 2: Create Windows 11 23H2 Bootable USB
Now, you have the Windows 11 23H2 ISO image, the next step is to make a bootable Windows 11 installation media. You can do this with the well-known UUByte ISO Editor app, which works well on Windows and macOS.
This versatile application supports multiple file systems such as NTFS, FAT and FAT32. It also supports UEFI as well as legacy BIOS boots. In addition, the software offers full support across a wide range of Windows operating system ranging from Windows 11 all the way back to Vista and XP. Here is how you can easily use this reliable utility to create bootable USB drive from an ISO file that you have downloaded.
Step 1: Download UUByte ISO Editor application from above location. Please note that this is a direct download link, which means the .exe file will be automatically downloaded when you click this link. Double-click the .exe file to install the software on your PC, and launch the application.
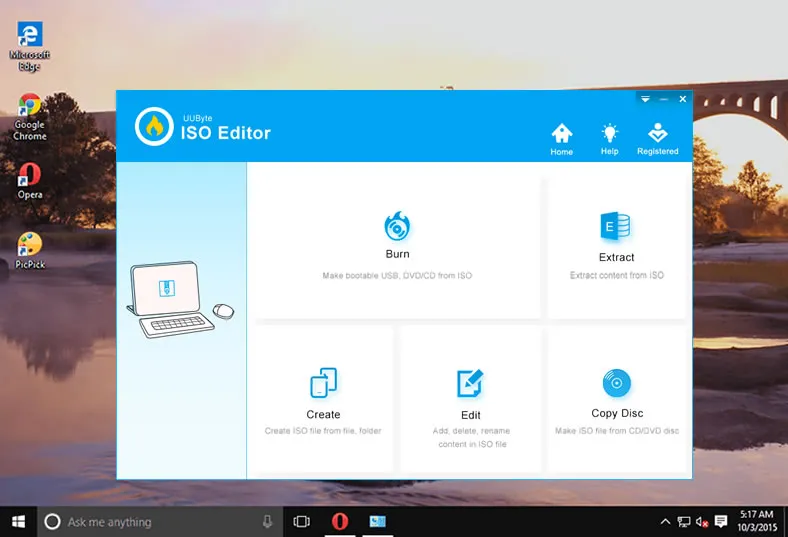
Step 2: Click "Burn" button on the main interface to initial the setup process. All you need to do is follow the onscreen instructions. After this, you will be taken to a page where you can select the ISO file from which you will be creating the bootable USB drive. Select the file and then insert the USB drive before moving to the next step.
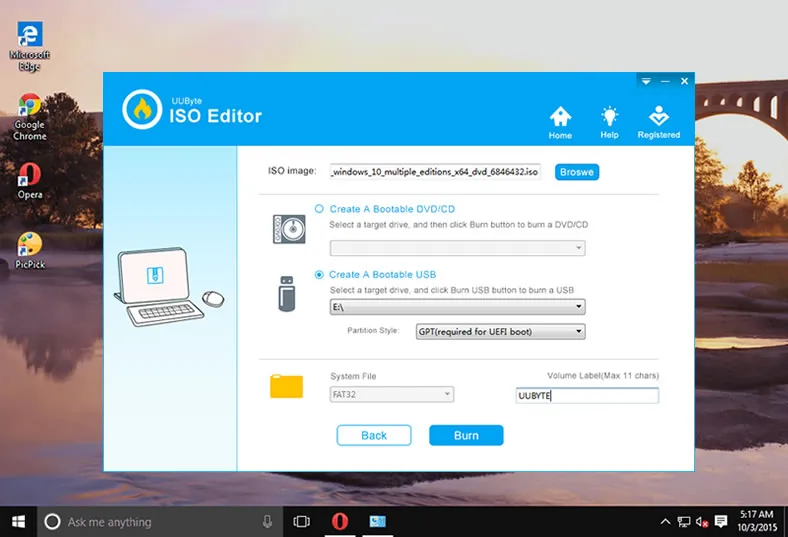
Step 3: You can now select USB as the burn option, and click on the button that says ‘Burn’. In a few moments, your bootable USB drive will be ready and you can remove it and use it for your purpose.
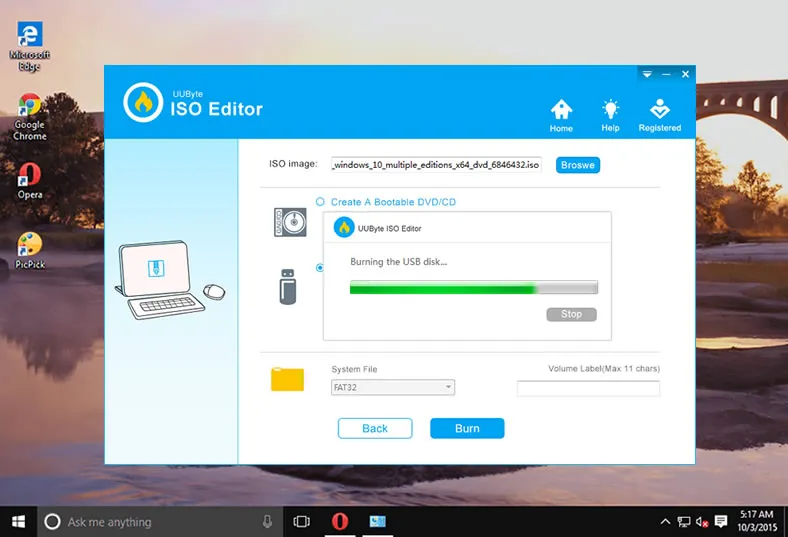
As you can see, there are no complicated steps to follow and no additional software required to create bootable media. The application is completely error free, so you can confidently use even a DVD or CD to create the required bootable media from your ISO file.
Part 3: Install Windows 11 23H2 from USB
To boot from USB and install Windows 11, follow the steps below. This works for most PCs, including modern hardware (with a few tweaks).
1. Plug the bootable USB into the computer where you want to install Windows 11.
2. Turn on or restart the computer.
3. As soon as the PC starts, press the key to open Boot Menu. Usually, the key is F10, F12, Del or ESC. It depends on the motherboard brand.
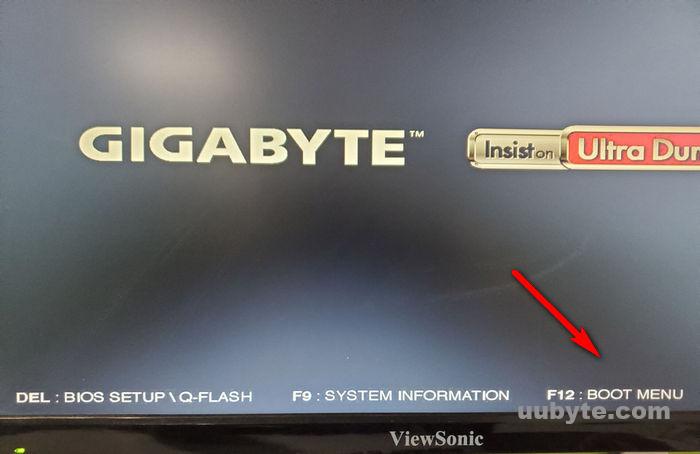
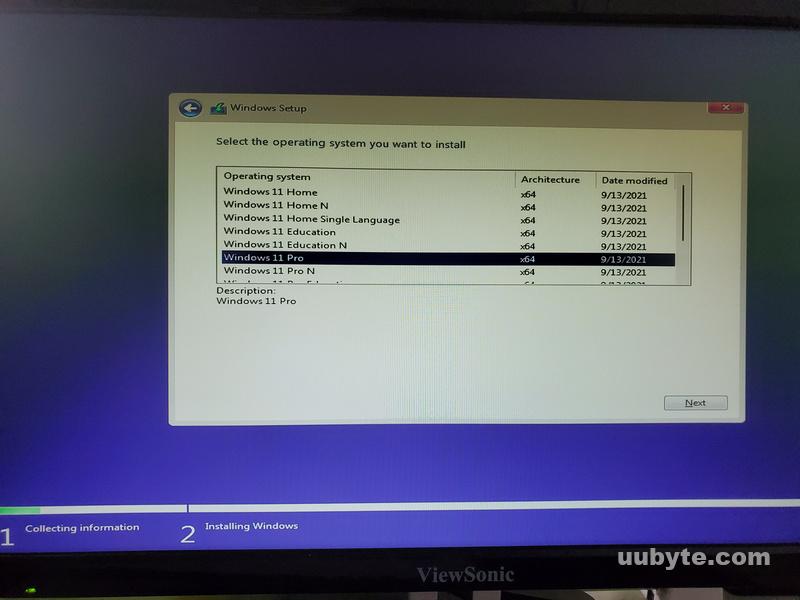
4. Use arrow keys to select your USB drive and hit Enter. Your PC will boot from the USB and load the Windows 11 setup screen. Follow the on-screen instructions to start the installation.
Conclusion
In the realm of Windows 11 installation and upgrades, having a dependable and efficient tool to create a bootable USB is indispensable. UUByte ISO Editor not only simplifies the process but also ensures that the resulting bootable media is robust and compatible with the latest 23H2 update. Its intuitive interface, comprehensive feature set, and reliability make it the best choice for both novice users and seasoned IT professionals.
By leveraging UUByte ISO Editor, you can streamline your Windows 11 installation experience, minimize potential errors, and take full advantage of the new enhancements that the 23H2 update has to offer. Embracing this tool will undoubtedly lead to a more seamless and effective approach to managing your Windows 11 environments.

