In previous tutorial, we wrote a post about creating macOS Catalina bootable USB on Mac, which is a simple tool and there are a couple of free tools to complete the task. You can even use the built-in tool Disk Utility and dd command to do it without installing any third-party apps. However, the situation is much different on Windows 10 because macOS install file (end with .dmg) is not supported by Windows OS. Unlike ISO image, there are few tools on Windows that can handle .dmg files. That's the most challenging part!
So in this article, we will show you how to create macOS bootable USB on Windows 10 and targets macOS Catalina specifically, which is the latest version of Apple macOS and it is easy to download the install file. This will be a great help if there were something wrong with your Mac and a fresh install was demanded. Also if you were a Mac enthusiast and can not afford the price, then it is not a bad choice to build a hackintosh with Catalina.
Before heading to the details of each method, please make sure you have downloaded a copy of Catalina OS dmg file from our Google Drive account and a working USB drive with more than 8 GB storage.
P.S. Please contact our support team (support@uubyte.com) if you need more macOS DMG file.
Method 1: Create macOS Catalina Bootable USB on Windows 10 via DMG Editor
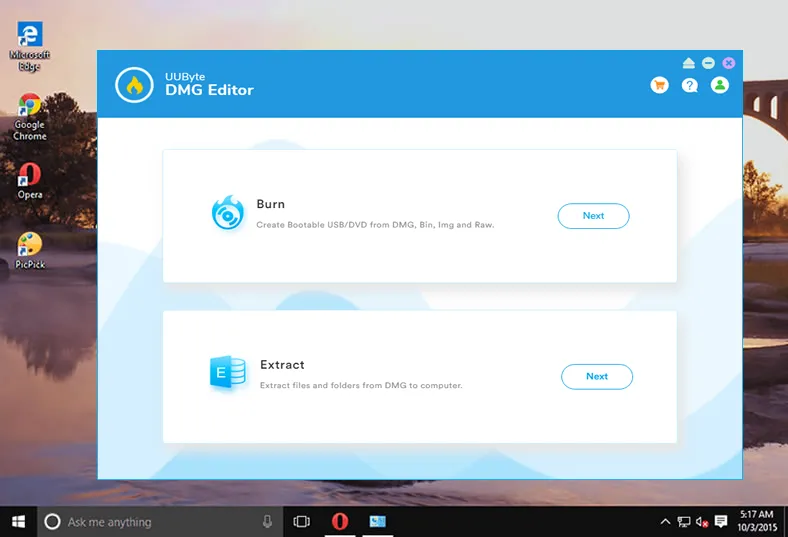
There are more than one solutions to create macOS Catalina Bootable USB on Windows 10 and we will go with easy one first. DMG Editor, a popular app developed by UUByte, is a multi-functional and cross-platform image burning tool that works on Windows, Linux and macOS. It supports creating bootable USB from popular image files, including dmg, iso, zip, img. And it has full support for Linux distros and old versions of Windows OS. macOS support was not available in previous versions. But now, the latest version of DMG Editor adds better support for macOS dmg file. Let's get a try first.
Step 1.Go to UUByte official website and download Windows version of Etcher from there.


Step 2. Run the executable file and complete the installation process. After that, insert an USB drive in Windows 10.

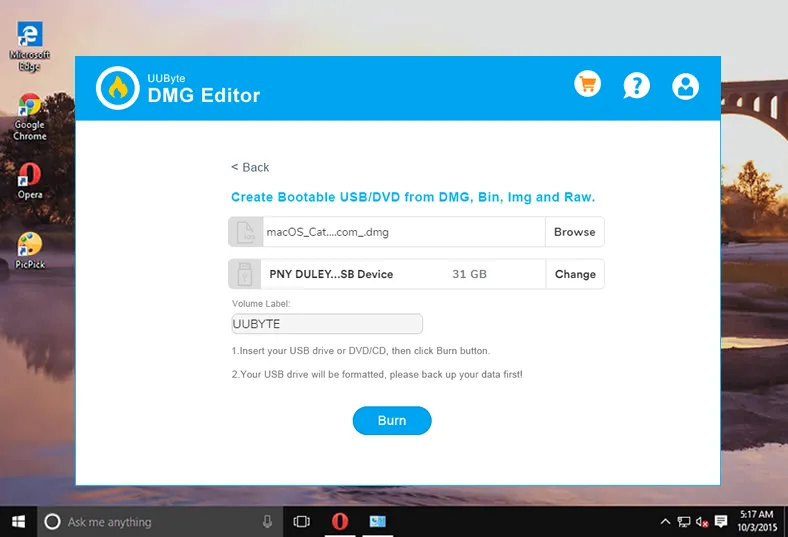
Step 3. Open the installed UUByte DMG Editor by double-clicking on the icon shown on your home screen. Click on the 'Burn' option then. After that, add Catalina .dmg file to the software and click on 'Change' button to choose the inserted USB device.

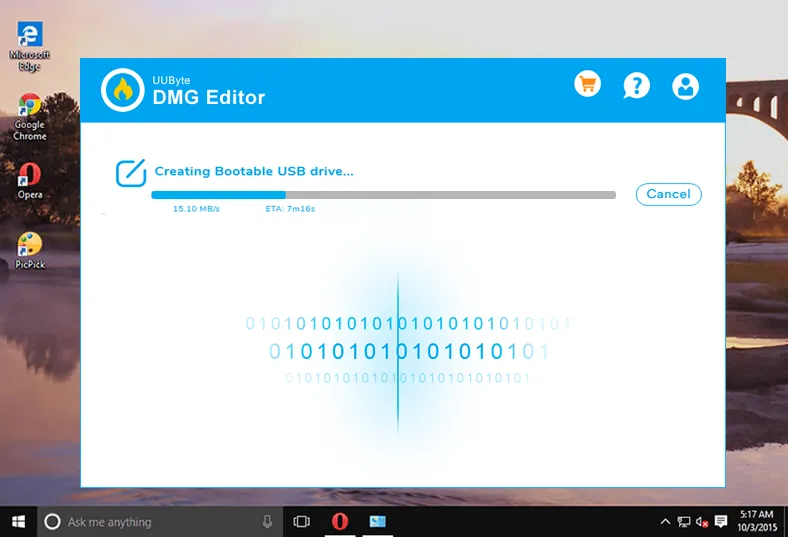
Step 4. Finally, click on the 'Burn' button to start the dmg burning process. At this time, a progress bar is displayed on the screen and it gives you an estimated calculation for the time remaining.

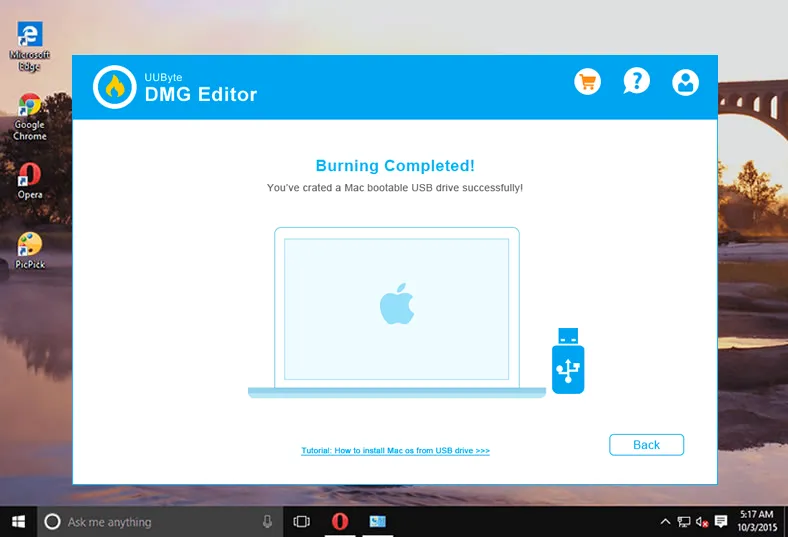
Step 5. Wait about 10 minutes. It will show you a pop-up message after completing the task successfully.

The process is very quick and easy to execute. But you might have issues running Etcher app on old computers with low profile hardware. Etcher GUI is built primarily on a new Javascript framework called Electron , which consumes a lot of computing resources. So if you were going to use Etcher to create macOS Catalina bootable USB, make sure testing it on a high-profile Windows 10 PC or laptop.


Method 2: Convert .dmg to .iso and Create macOS Catalina Bootable USB
macOS Catalina install image is distributed in .dmg format and Windows 10 has no support. Hen it is almost impossible to read such files in conventional ways. So in this part, we will convert macOS Catalina dmg file into ISO and create a bootable installer by burning the ISO file to USB. This can be done with the help of third-party software.
To execute the method, you need two software. First, you need a special software to convert dmg to ISO. Second, an ISO to USB burning software to make bootable USB from ISO file. To demonstrate, we have used 7 PowerISO & UUByte ISO Editor to create macOS Catalina bootable USB from Windows 10.
Step 1: Download and install PowerISO on Windows 10.
Step 2: Insert your USB drive. Right-click on this peripheral device and choose the option to format it. After a few seconds, you will get the notification of completing the format process.
Step 3: Now, open PowerISO and navigate to Tool menu. From the pop-up list, please click the 'Convert' option.

Step 4: In a pop-up window, click the folder icon to add macOS Catalina dmg file in Source file field. And set an output file name under Destination file section. Next. choose Standard ISO Images (.ISO) from Output image file format.

Step 5: When the ISO file is created successfully. Download and install UUByte ISO Editor. Then click Burn button to open ISO burning Window. Next, add ISO file to the program and select the USB name. Wait for 7 minutes, and a bootable USB is ready!

Step 6: After getting a task completion message on screen, eject the USB and then start installing macOS Catalina from the USB drive.
The solution is simple but may need to purchase a couple of tools for executing the steps. But if you will search smartly on the internet, chances are there that you can get the required tools without paying any cost. However, if you want to bypass using any of the third-party tools, you can create the Catalina OS bootable USB by accessing macOS in a virtual machine.
Method 3: Use TransMac to Create macOS Catalina Bootable USB in Windows 10
TransMac is a single-purpose utility to open Mac disk image from a Windows PC. It's one of the quickest methods to create macOS bootable USB drive from dmg file. However, the support for Catalina is not good as Mojave and High Serrira. Plus, you have to pay for 59 USD to use the burn feature. That's why we mention this app at the end of this post.
Step 1: Download TransMac from the official site and run the .exe file to complete the installation process.
Step 2: Now plug in a USB device into the port. Now right-click on TransMac icon shown on the home screen and then choose to Run as administrator.
Step 3: After landing inside the tool's window, all disk drives will be displayed on the left side automatically. Click File -> Open Disk Image to load macOS Catalina dmf file into the program.

Step 4: Before proceeding further, you need to format your USB device to make it compatible with Mac HFS or APS partition. For doing the same, click on the 'Format Diks for Mac' option. Wait for 30 seconds to complete the process.

Step 5: Right-click on the selected USB disk. From the shown list, click on 'Restore with Disk Image'. If it shows any warning message, just click on the OK button to accept.
Step 6: After that, select the location of saved Mac OS Catalina DMG file and then click on the OK button. Now stay back and look after 20 minutes. You will get ready with a bootable Catalina USB.

TransMac is one of the easiest method to create a bootable macOS Installer USB on a Windows PC. You can use this application to burn any version of macOS operating system file to USB.
Conclusion
To conclude, we would recommend going with either the first or the second method to create bootable macOS Catalina USB. Both are super easy to follow because you don't need to install multiple tools and go through a multi-layer process to meet your requirement.


