Windows is a more popular desktop operating system than macOS. To be frankly, Mac users need to use Windows from time to time as some of the apps don't have a Mac version, especially for gaming and design software. However, most of the Mac being sold come with a small SSD (128 or 256 SSD). And the Mac can not afford to create a Windows virtual machine or install Windows 10 on Mac with Boot Camp Assistant. That's why Windows To Go technology (short for WTG) comes into help, which is a more convenient solution to directly run Windows from USB on a Mac.
Hasleo WintoUSB Introduction
Hasleo Software, a leading software development company founded in 2012, has an impressive portfolio of products ranging from data recovery to security to disk management. One of their products that we're covering today is Hasleo WinToUSB, a hugely popular Windows To Go creator.
Essentially, this software application allows you to create a Windows To Go USB drive so you can run your preferred and customized version of Windows on any Windows computer. In addition, it boasts a lot of features that you won't find in your typical WTG creator, such as the native module in the Enterprise version of Windows. Here's a brief list of these features:
Key Features of Hasleo WintoUSB
- Create Windows To Go USB for any version of Windows from Windows 7 through Windows 10.
- Use non-certified USB to create Windows To GO drives.
- Support BIOS and UEFI to create a Windows installer.
- Use a variety of source files for your WTG - CD/DVD, WIM, ISO, VHD, or VHDX.
- Create a 'hot clone' of your current Windows set up.
- Non-512 byte sector and Thunderbolt support.
Does WinToUSB Have a Mac Version?
This is where we run into the first - and probably biggest - problem with Hasleo WinToUSB. It does not have a Mac version to create a WTG to run on a Mac system. The following screenshot is captured from Hasleo official website and the download button points to an exe file only, which is a Windows-based installation package. Unfortunately, this means there is no Mac version of WinToUSB.

In addition, it certainly doesn't help that Boot Camp Assistant is an error-prone application, especially when it comes to creating a USB installer to run Windows 10 on a Mac computer or laptop.
The only thing you can do in this instance is to find an application that can do the same things as Hasleo WinToUSB can, but with the added capability of being able to run Windows To Go USB drive on a Mac and that's where UUByte WinToUSB Pro comes in.
UUByte WintoUSB Pro - WinToUSB Mac Alternative
In addition to offering all the features of Hasleo WinToUSB, UUByte WinToUSB Pro has a unique feature that allows you to use your WTG drive on any computer running macOS. This is extremely useful because it gives you a Windows alternative to Boot Camp Assistant or the need to run a virtual machine on your Mac so it can dual-boot with Windows. The application itself is extremely user-friendly, which means you really don't need any experience to get it to work as required. The process to create a WTG USB drive that can be used on a Mac machine is described in the following section.
How to Create Windows To Go USB Drive to be Used on a Mac
Step 1: Install UUByte WinToUSB Pro on a Windows PC and launch the program after inserting a USB drive with enough capacity to hold the Windows installation ISO you intend to use for the WTG creation. You can also install it on a virtual machine running Windows on a Mac.
Step 2: Down the ISO file for your Windows installation and insert the USB drive into the computer. The ISO file can be downloaded from Microsoft's servers directly if you're doing this on a Mac; otherwise, you will need to bypass Media Creation Tool to get Windows ISO.
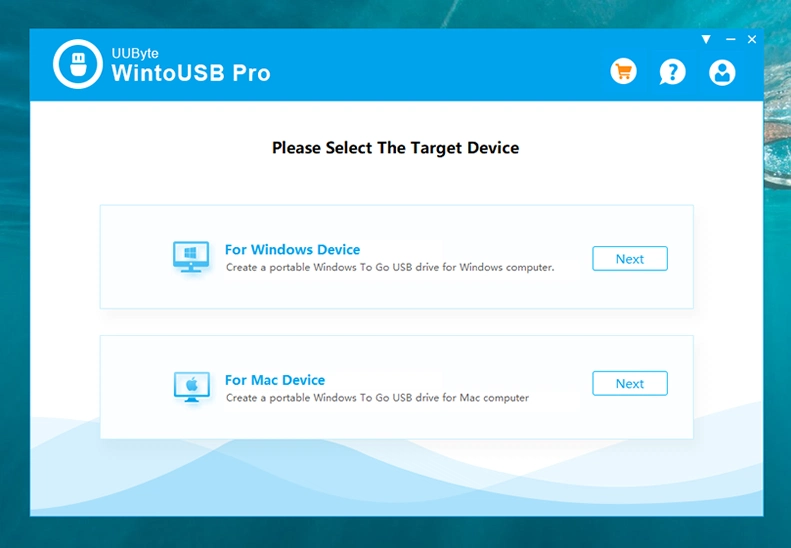
Step 3: In UUByte WinToUSB Pro interface, choose Target Device option as For Mac Device.

Step 4: Click Next, then choose From Windows Image File as your source file and select the ISO file you downloaded using the Folder icon, then click Next.

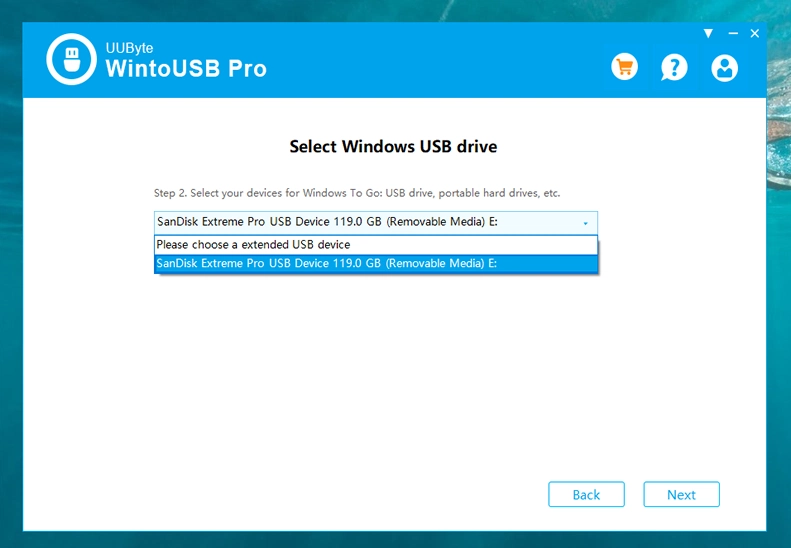
Step 5: Choose the USB drive that you inserted in Step 2 above and click Next again.

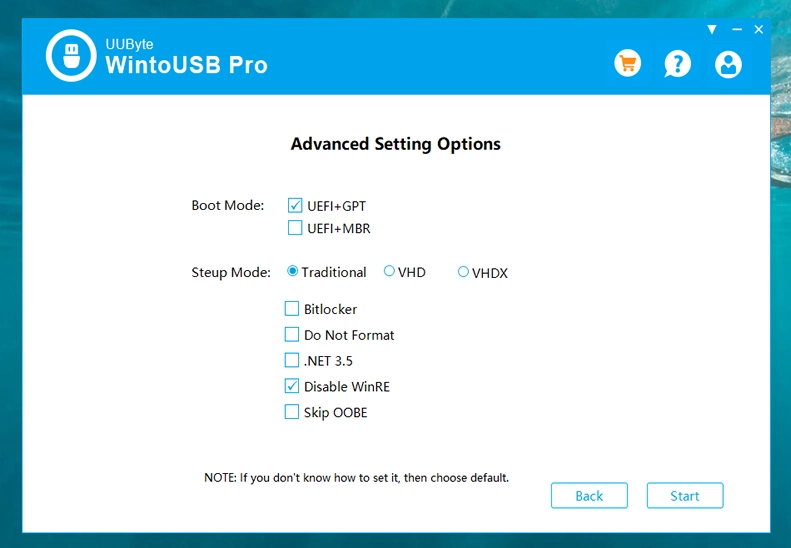
Step 6: In Advanced Setting Options window, leave the default values are they are because your ISO has been analyzed and the settings have been automatically applied. Click Start to create your WTG USB drive.

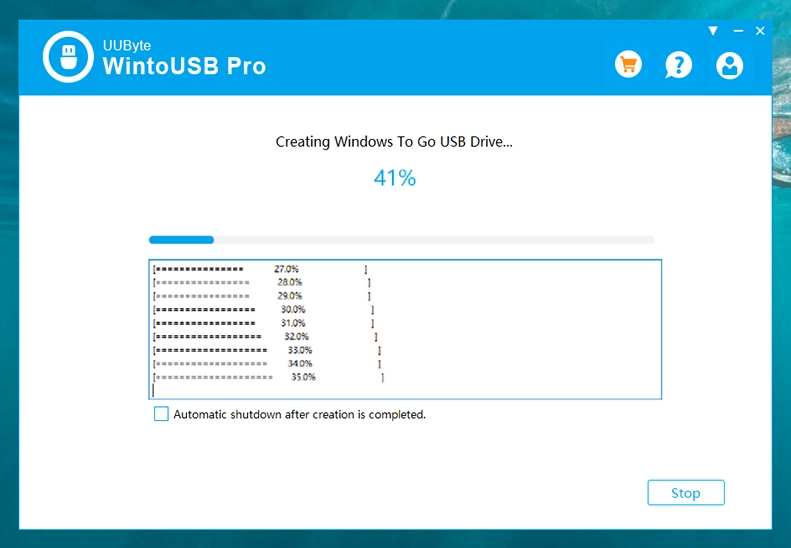
Step 7: Click Start button to proceed. A warning message will be popped up and ask you to take a backup of important files if any. You can click on the Yes button if you have already taken the backup.

Step 8: Restart your Mac and hold down the Option (Alt) key until you see the Startup Manager window. You'll see something called EFI Boot. Click on that and wait for the Windows desktop to appear on your Mac screen.
Step 9: Although you now have Windows on Mac, you need to get the latest device drivers. For this, open Boot Camp Assistant and go to the Action tab at the top. Using your WTG USB as the destination drive, choose the Download Windows Support Software option.

Step 10: After the files are downloaded, go to the Windows Partition after restarting your Mac and run setup.exe from WindowsSupport → Boot Camp. This will install all the device drivers like Bluetooth, network drive, etc.

That's it. Now, any time you want to run the WTG on your Mac, just insert the drive and boot from it using the Option key during startup and selecting the EFI Boot option in Startup Manager.

Final Thoughts
As you can see, there are a lot of benefits to using a Windows To Go USB in order to run Windows from USB on a Mac. First of all, it doesn't use your Mac's resources so even if you have only 4GB of RAM, it won't matter. Second, it's portable, which means you can basically run it on any computer running macOS.
W, it's much safer to run Windows on Mac this way rather than using Boot Camp, in which you'll need to create a separate drive partition for the Windows installation, thereby using up valuable drive space. Finally, if you intend to download a lot of apps when running your Windows in this manner, we recommend using a high-capacity USB drive to create your WTG USB stick.


