You can burn an ISO to CD for various purposes, including OS installation, repairs, etc. But how do you burn ISO to CD on a macOS computer running the latest version, Catalina? As you might know, ISO is not native format on macOS environment; however, it does have the capability of handling ISO files if you use the right tools. That's why we've showcased three of the best methods to burn ISO file to a CD or DVD on Catalina. Read on to learn more about these methods and the steps involved in the process.
Method 1: Burn ISO to CD/DVD on macOS Catalina with UUByte (Bootable)
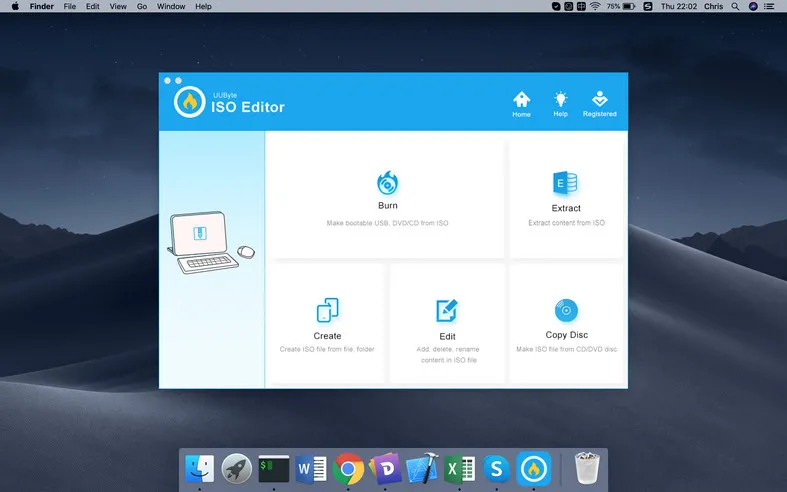
This Mac utility is also available for Windows and is one of the most versatile ISO utilities around. Aside from being able to burn ISO to CD, it can also be used to open ISO files, add or remove content, extract content, and create a new ISO file from folders. The next section talks about how to burn ISO to a CD on macOS Catalina using UUbyte ISO Editor.


Step 1: After installing UUbyte ISO Editor on your Mac and downloading the ISO file from whatever source you're using (you can also use a local ISO file that you have on your Mac's hard drive), launch the application and insert a blank CD or DVD. Ideally, a DVD would be better if the ISO contains a large installation file. You can also use a USB drive for this purpose.

Step 2: Click the "Burn" module on the welcome page of UUByte ISO Editor and check to see if your CD is identified in the corresponding field.

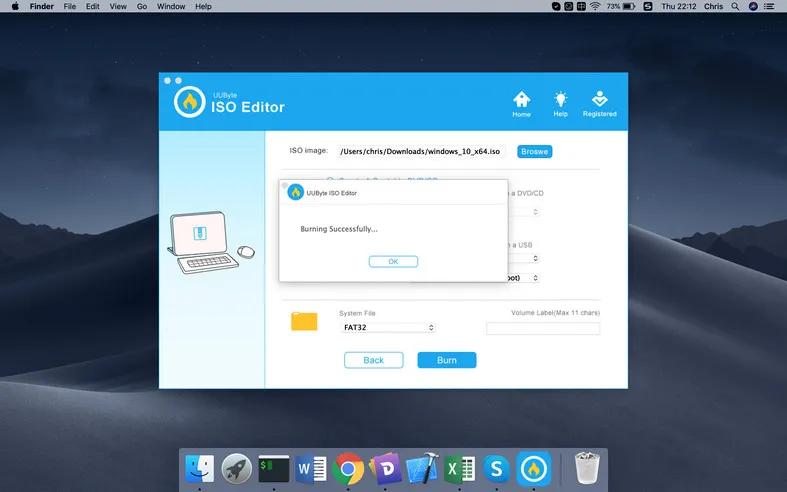
Step 3: There is no need to make any settings changes as the default values for advanced settings will be based on the media you inserted. Click the "Burn" button and wait for the ISO to be burned to the CD. That's it!

The simplicity of the interface and the clean functionality are two of the most attractive features of this popular ISO editor. Due to these reasons, it's a favorite of new users who have almost zero experience working with disk image files and burning applications.


Method 2: Burn ISO to CD/DVD Free on Mac Catalina in Finder App
This method actually works on all versions of macOS but is not often used because many users are unaware that it even exists. If you prefer not to use a third-party application and just need something to burn an ISO to a CD, this might be a suitable method. The process is shown below:
Step 1: Go to Finder, locate the ISO file, and click on it once. Don't double-click it or it open the file, which is not possible on a Mac without first mounting it as a virtual drive. You will get a warning if you tried to open the ISO file.

Step 2: Now, insert a CD into the optical drive. The CD should either be a blank writable one or a re-writable one. Make sure that, in the second instance, you have moved the existing data to another location or backed it up somewhere. It will be erased during the burning process.
Step 3: With the file selected, click File on the top menu and then click "Burn" option located at the bottom to proceed.

Step 4: In the window that opens, click the "Burn" button after tweaking the settings to match your preference, if required.
This is a fairly straightforward method but it does have some flaws. Since ISO is not native to Mac, the accuracy of the burned disk might not be consistent at all times. And you might receive error like the following screenshot. IT professionals with wasted disks can attest to this, especially if the ISO is a bootable file meant for installation or repair.

Method 3: Burn ISO to CD/DVD on macOS Catalina Using Terminal App
Terminal app is a frightening tool for inexperienced users because you can do serious damage to your system if you don't know exactly what you're doing. However, the burning process for an ISO file is very simple and safe, as long as you follow the instructions carefully.
Step 1: Open Terminal on your macOS Catalina system and enter the following command:
hdiutil burn ubuntu.iso
The filename with the .iso extension should be the same as your ISO file. The command shown is just an example of what it should look like.
Step 2: Hit Enter after typing in the command and wait for the prompt to insert your disk. When you see it, place the CD into your optical drive and insert it.

Step 3: Once you see the following message (hdiutil: burn: completed) in Terminal, you can eject the CD.
Conclusion
All these three methods are equally fast and convenient, but it's always better to use a purpose-built software that offers a load of additional features for both basic and advanced users. The benefits are obvious and the choice is yours.


