Opening a BitLocker encrypted drive on macOS Catalina and previous versions are not difficult at all. The only requirement is to grant Full Disk Access permission to UUByte BitLocker app. However, the situation has changed dramatically since macOS Big Sur and Apple's Mac with M1/M2/M3/M4 chip. More security enhancements are improved, such as disabling System Extension by default. Hence, many BitLocker Reader apps failed to work on Big Sur or Apple Silicon Mac.
Don't worry! The latest version of UUByte BitLocker Geeker adds support for macOS Sequoia and Macs with Apple M4 chip. But, there are more additional steps that need to be done before decrypting a BitLocker drive with BitLocker Geeker. Below is the step-by-step guide. Make sure you follow the steps accurately.
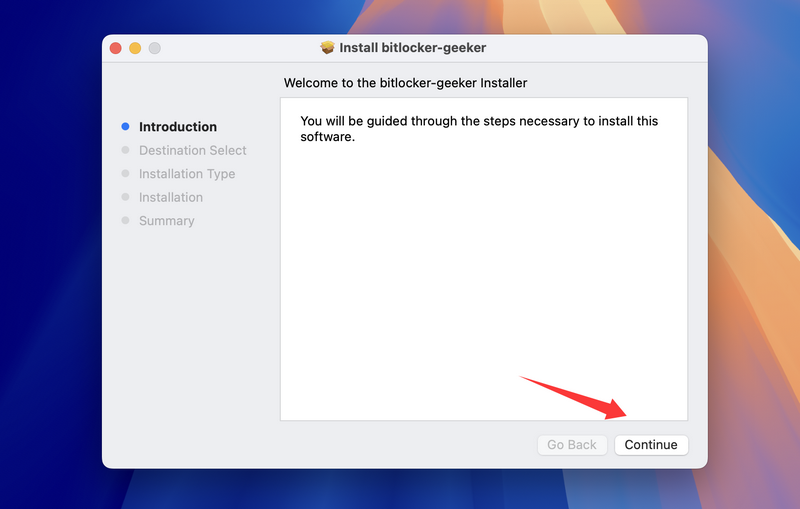
Step 1: Download and Install BitLocker Geeker App on Mac M1/M2/M3/M4
Download .pkg installer of UUByte BitLocker from above link and double click the file to start the installation.
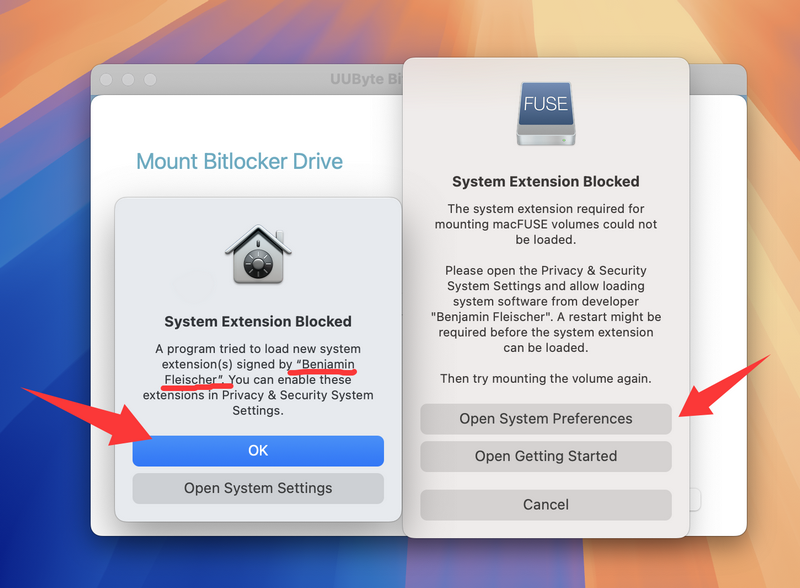
At the end of this process, you will see a notification, saying System Extension Blocked, which is required by BitLocker Geeker app.
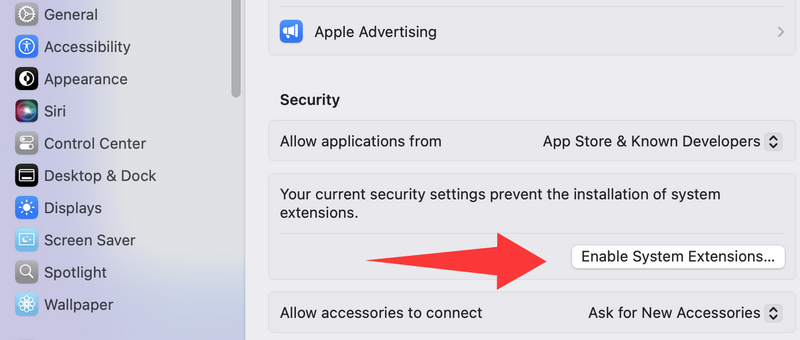
Step 2: Enable System Extensions
Please click Open Security Preferences and click Enable system extensions… in Security & Privacy Window.
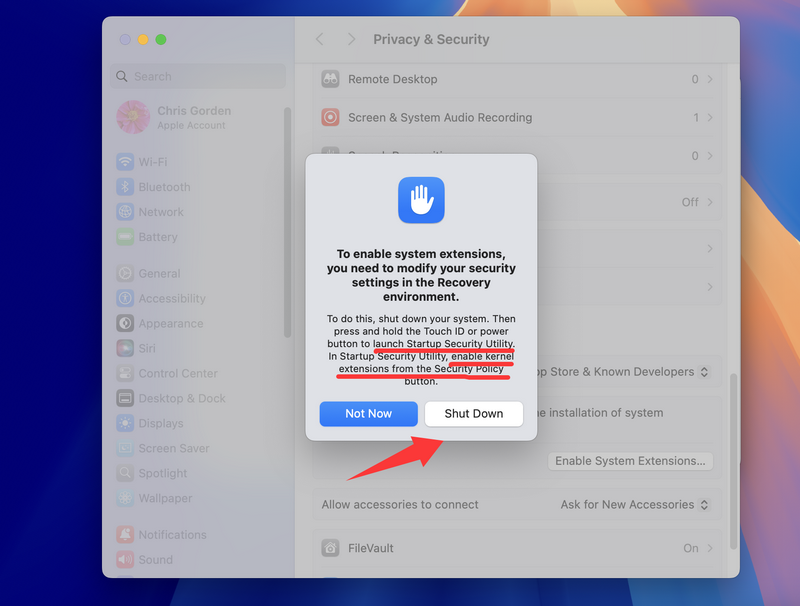
After enabling the System Extensions, click the Shutdown button to power off the Mac..
Step 3: Boot the Mac in Recovery Environment
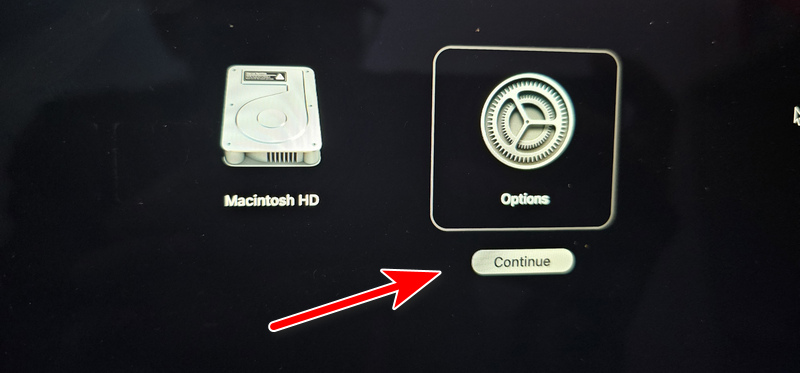
Pree and hold the Power button to launch Startup Seucrity Utility where you can change a couple of security settings. Click the Continue button to open the utility.
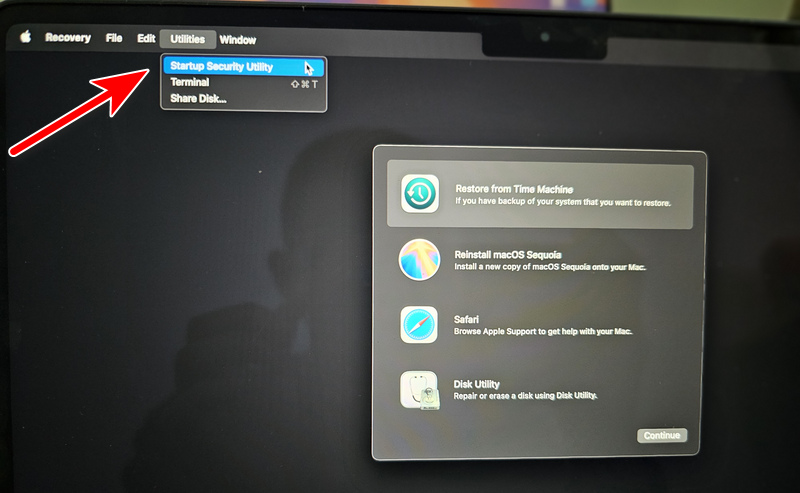
Choose the login account and input the password to proceed in macOS Recovery. Under Utilities menu at the top, choose Startup Security Utility.
Step 4: Change Startup Seucrity Level
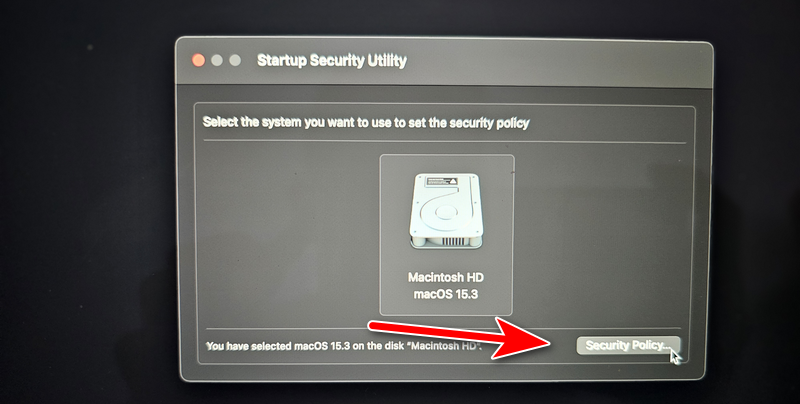
Select the internal drive and enter the password to unlock the options. Click the Security Policy... option to see the security menus.
In new window, choose
Reduced Security. From there, please enable the first option Allow user management of kernel extensions from identified developers. Click OK to save the change.

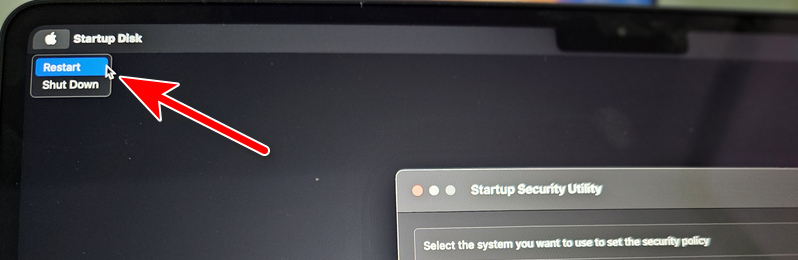
Finally, Click the upper left Apple logo to restart the Mac.
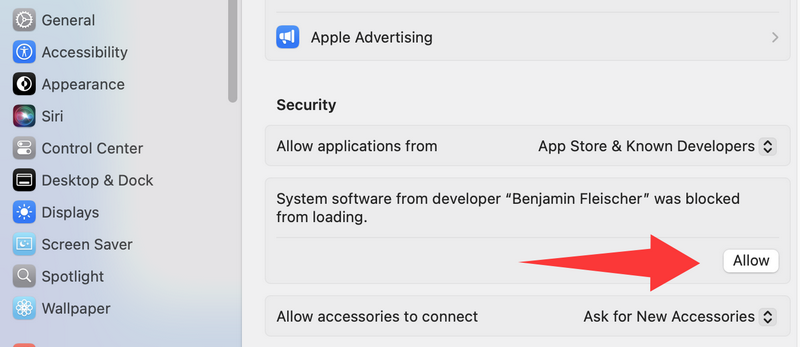
Step 5: Allow System Software in Privacy Settings
Your Mac will reboot and you will see a new text under Security & Privacy window in System Preferences. Please click Allow button to install this system extension on the Mac.
Step 6: Restart Mac
A restart is required to make the chang into effect. Please do as it requests.

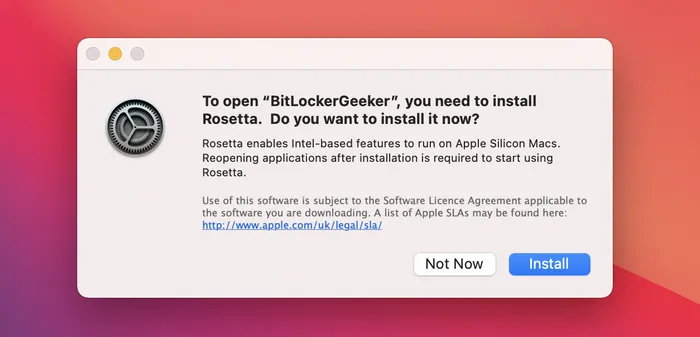
Step 7: Install Rosetta App (Optional)
Now open BitLocker Geeker app on your Mac and install Rosetta app as prompted. For references, Rosetta app is a system app developed by Apple that helps in running Intel-based apps on a Mac powered by Apple Chip.
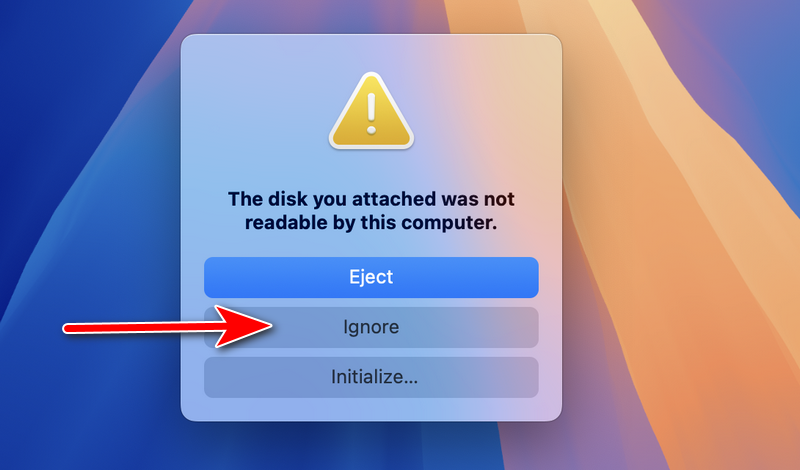
Step 8: Connect BitLocker Drive to Mac
Insert BitLocker encrypted drive into Mac and ignore the error message.
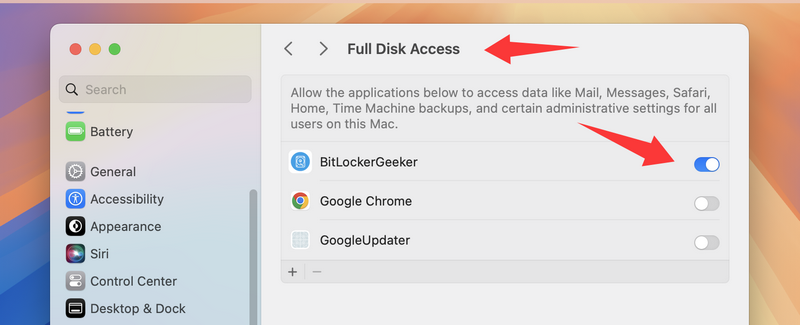
Step 9: Open BitLocker Geeker App and All Full Disk Access
Once the app is loaded, you will be asked to add BitLocker Geeker app in Full Disk Access. Click Yes to open the settings and grant the Full Disk Access to the BitLocker Geeker app.
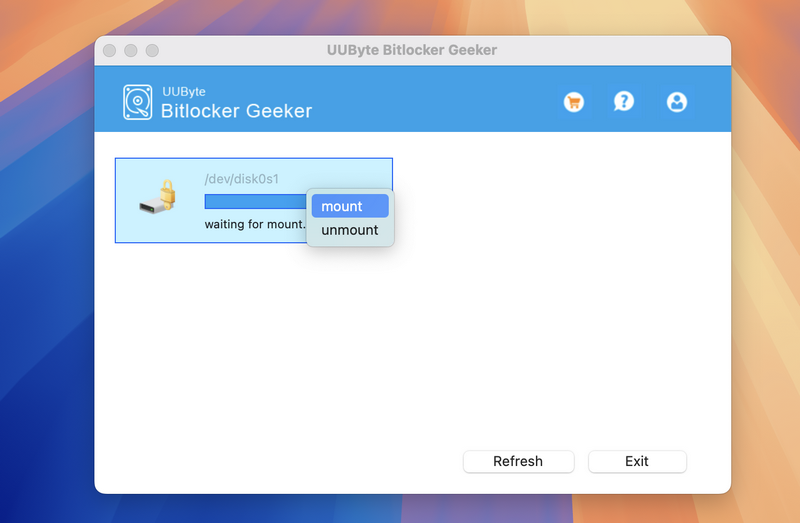
Step 10: Mount BitLocker Drive with Lock Sign
Now, click the clock icon at the bottom and input the login password to allow Bitlockger Geeker app for full disk access.
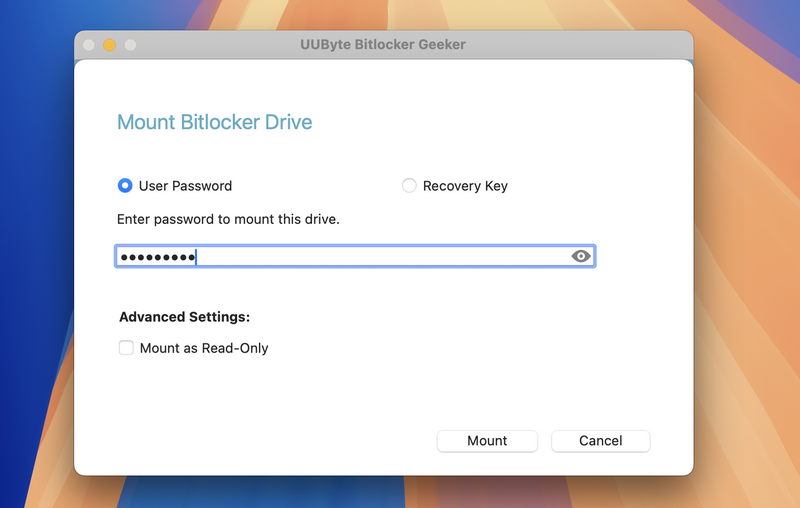
Step 11: UnlockRead BitLocker Drive on Mac
Input the correct BitLocker password and mount the drive.
Step 12: Read BitLocker Drive on Mac
Wait a few seconds and you will see a pop-up window that shows up all files and folders in BitLocker drive. Now, you can copy/paste files from BitLocker drive to Mac or from Mac to BitLocker drive.

Summary:
If you still have problem, please contact our support team. Make sure provide more details about the device and the error (screenshot or video preferred) so we can identify the issue more quickly.