Note: For Apple Silicon Mac M1/M2/M3/M4, please read this user guide instead.
This is the online portal that demonstrates how to use our BitLocker Geeker software to read and write an encrypted BitLocker drive on Mac. Please follow the steps carefully!
Step 1: Download and Install BitLocker Geeker on Mac
Click the download button at the upper right corner and follow the screen prompt to install UUByte BitLocker Geeker on your Mac. During the installation process, you need to input the user password to grant permission to the app.
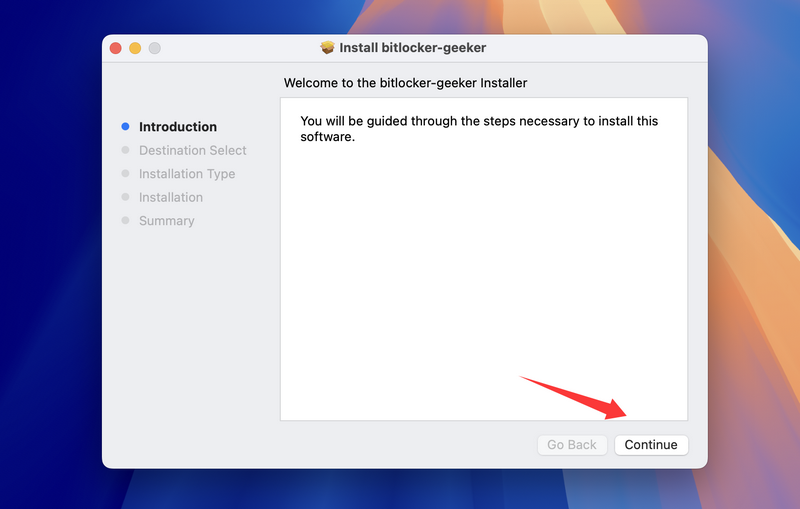
Note: At the end of this process, the installation wizard will ask you if keep or delete the installation file, please select Keep.
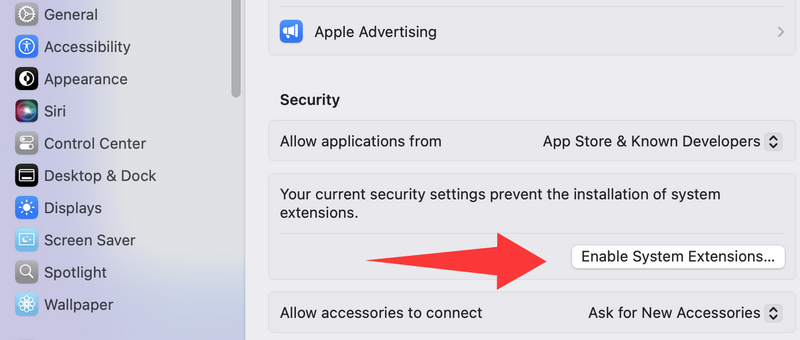
Step 2: Enable System Extension
BitLocker encryption is not supported by macOS. You need to install the system extension to allow accessing BitLocker drive on Mac. After that you should restart the Mac to save the changes.
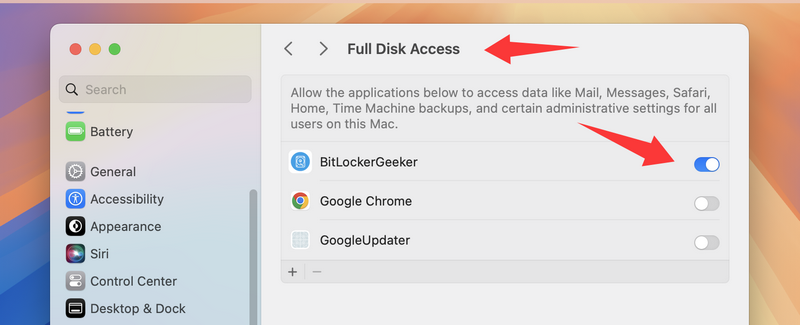
Step 3: Grant Full Disk Access to BitLocker Geeker App
On macOS Catalina and later, it is mandatory to enable Full Disk Access permission for BitLocker Geeker app.
First, Open System Preferences and locate Security & Privacy on the panel. Click the padlock at the left bottom and input password to unlock it.
Scroll down the items at the left section and find Full Disk Access option. From the right side, click the + symbol to add BitLocker Geeker app to it.
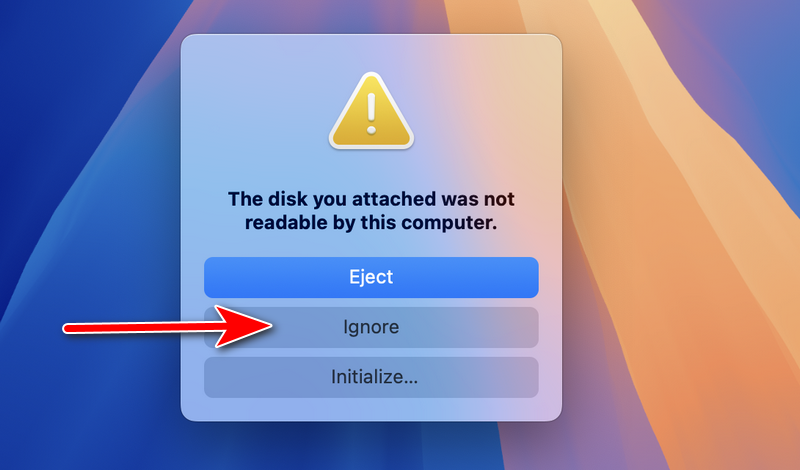
Step 4: Insert BitLocker Encrypted USB Drive into Mac
When a BitLocker encrypted USB drive is connected to Mac via USB port, you will see the following message within a few seconds. In here, you should click Ignore option at this time. The Initialize option will format the drive and Eject option will unmounts the drive.
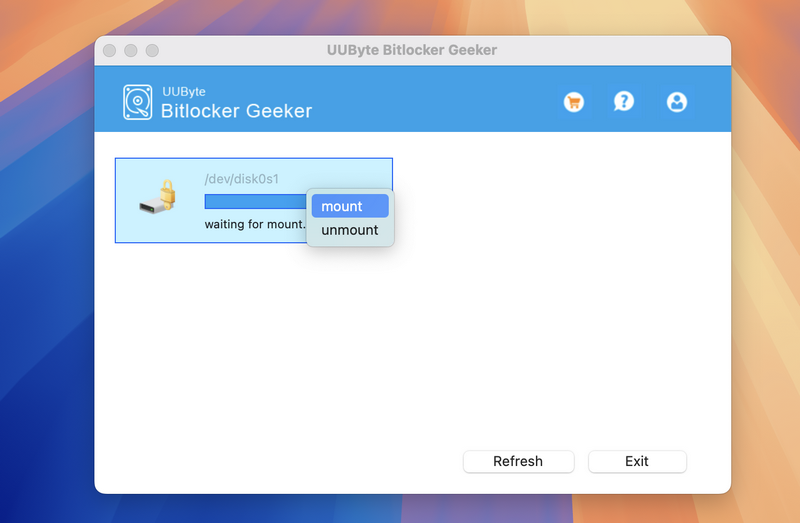
Step 5: Mount BitLocker Drive for Reading and Writing
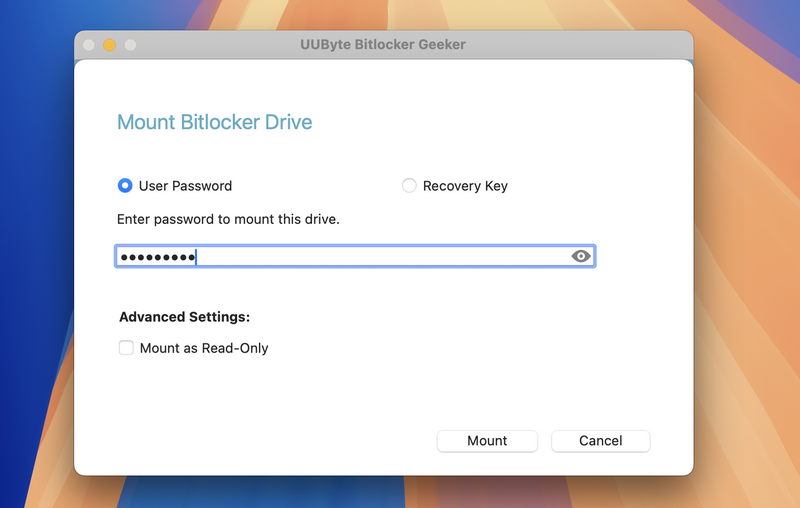
Open BitLocker Geeker app on your Mac and you will see several disks being displayed on the welcome screen. Click the drive name with a lock icon and input BitLocker password. After that, click Mount button to open this BitLocker drive.
Input the correct BitLocker password and mount the drive.
Wait a few seconds and you will see a pop-up window that shows up all files and folders in BitLocker drive. Now, you can copy/paste files from BitLocker drive to Mac or from Mac to BitLocker drive.

FAQ: Can't Open BitLocker Disk on Your Mac?
If you can't read the BitLocker drive on MAC, a pop-up will ask you to enable System Extensions ("Benjamin Fleischer). Then you will be able to read and write NTFS files on Mac easily. It won't lower your Mac security.
For Intel-based Mac, enable System Extension
Step 1. Follow the setup wizard to install BitLocker Geeker and run it.
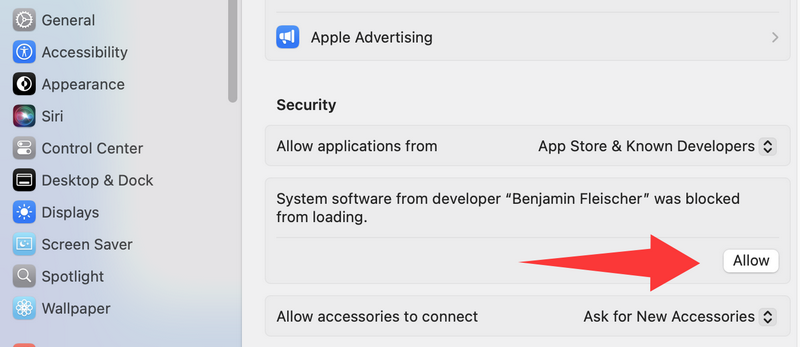
Step 2. When seeing "System Extensions Blocked", open Security & Privacy tab.
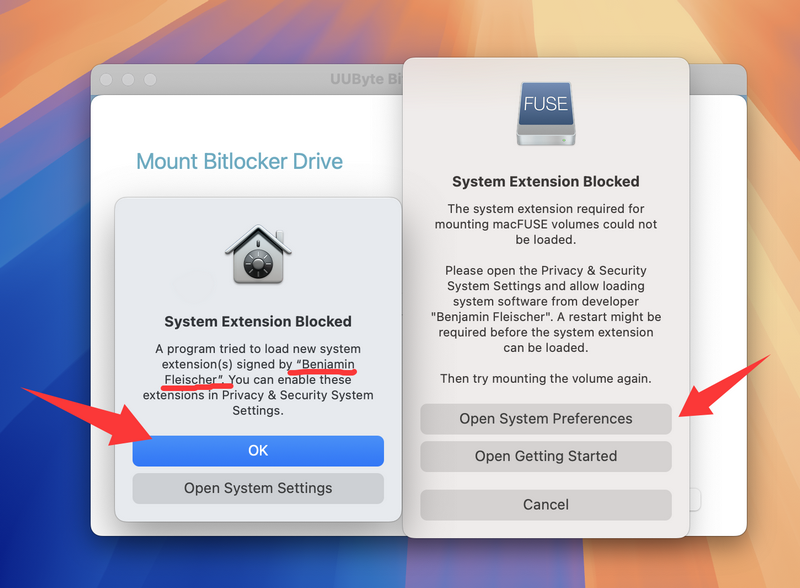
Step 3. Click the "Open System Preferences" > "Security & Privacy" pane and click the "Allow" button to allow "Benjamin Fleischer".
Step 4. Restart your Mac to complete the setup.

For Apple Silicon M1/M2/M3/M4 Mac
To enable system extension on Apple Silicon M1/M2/M3/M4 Mac, read our article here >>>.
Summary:
The above is a complete tutorial for using our BitLocker Geeker app on Mac. If you have any question, please check out FAQ page or contact us via Email. We will reply as soon as possible.