UUByte WintoUSB Pro is a fantastic tool for creating portable Windows To Go drive so that you can directly run Windows 10 from external USB, hard disk or SSD. If you have any issue in using this tool, please check the tutorial in below. This post is intended to share detailed steps on how to use this Windows To Go creation software.
Preparation: Software Installation and Registration
To get started, there are a few things you should prepare for in order to directly run Windows OS from external portable drive. Just follow the guideline and you will get the best from Windows To Go technology.
High-speed External Drive: We recommend using USB 3.0 or 3.1 drive for this purpose, which has faster reading and writing speed. So when you run Windows from it, it will be smooth enough without lagging. It can be a USB drive, portable hard drive or portable SSD.
Software Installation: Click the Download button at the upper right corner to save the setup file from our website. Double click the .exe file to start the installation process. Once it is done, the software will be opened automatically.
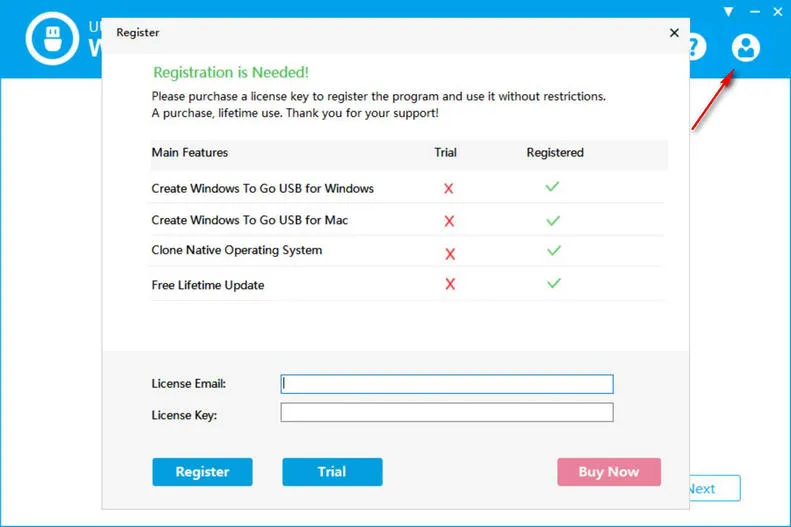
Software Registration: WintoUSB Pro is a commercial product and needs to be activated with a registration code. You can get one from here. Once you have the valid code, please click the human icon at the upper right corner where you can input license email and code for registration.
How to Create Windows To Go USB Drive from Windows ISO File
There are two different ways to create a portable Windows drive within WintoUSB Pro. The most popular one is creating Windows To Go drive from Windows ISO image file. The other is by cloning an existing Windows partition to external drive. We will go with the Windows ISO image option first.
Step 1: Insert the target drive (USB/HDD/SDD) into the computer and backup the data on it.
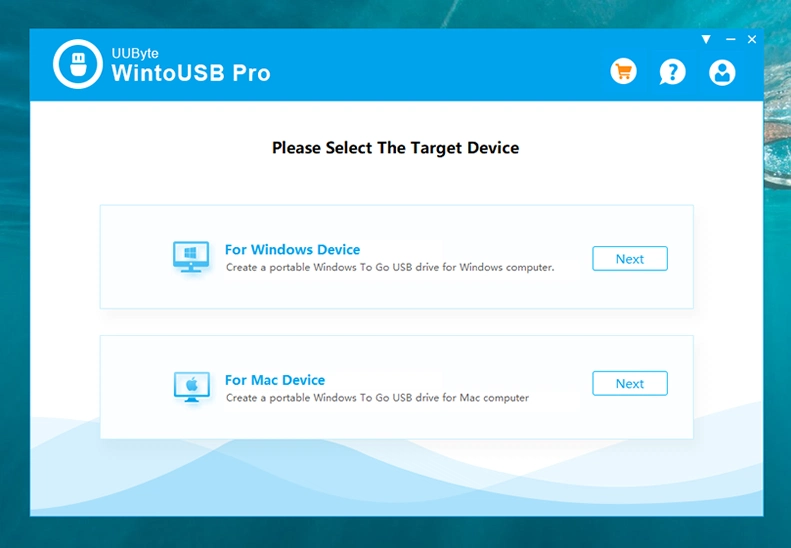
Step 2:Run WintoUSB Prom from your computer and choose For Windows Device at welcome screen and click "Next".
Step 3: You have to import a Windows ISO image file from here. Please check the radio button at the right side of From Windows Image File; then click the folder button to add Windows ISO image file into the program. Wait 1-3 seconds and select a Windows version (Pro/Home/Enterprise) from drop-down menu.
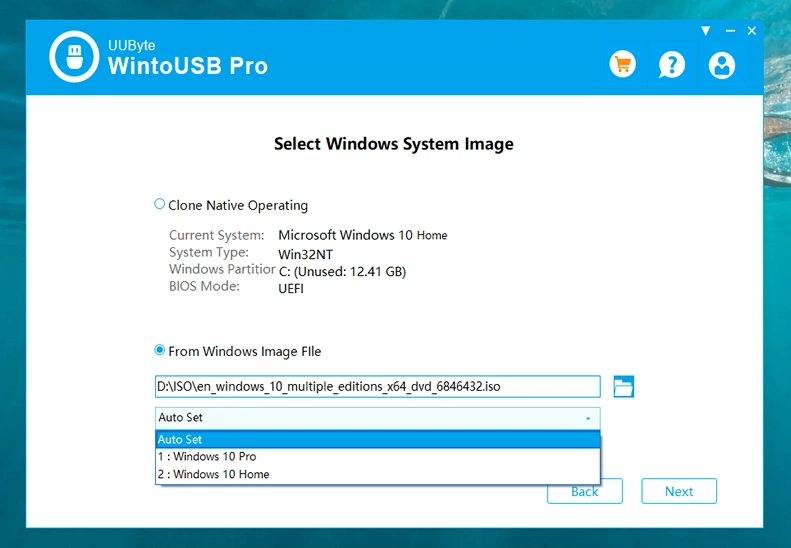
Note: You have to mount or unpack the ISO image file on Windows 7 and locate install.wim file in sources folder.
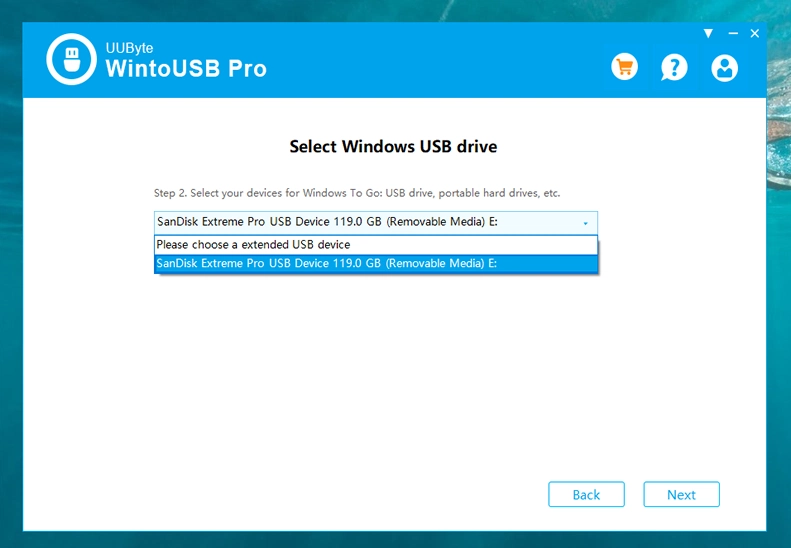
Step 4: Pick up the drive name from drop-down menu and click "Next".
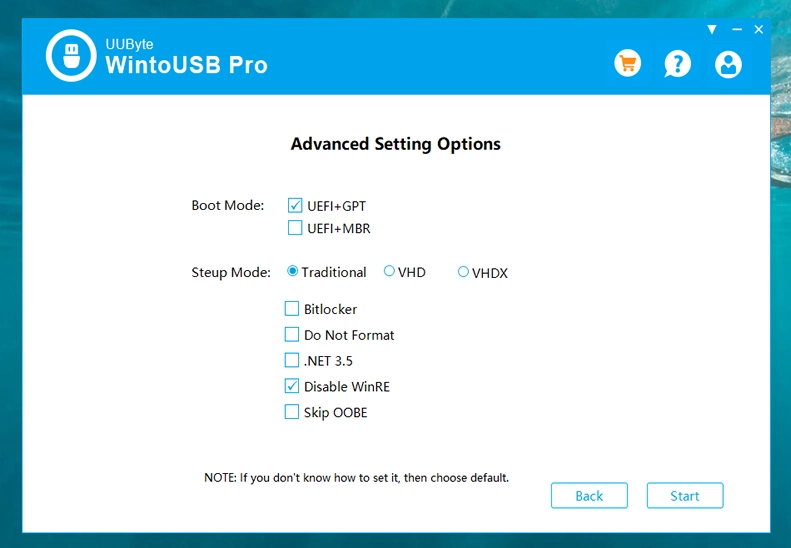
Step 5: In Advanced Setting Options, you must select a booting scheme and disk mode. Usually, you can go with the default option.
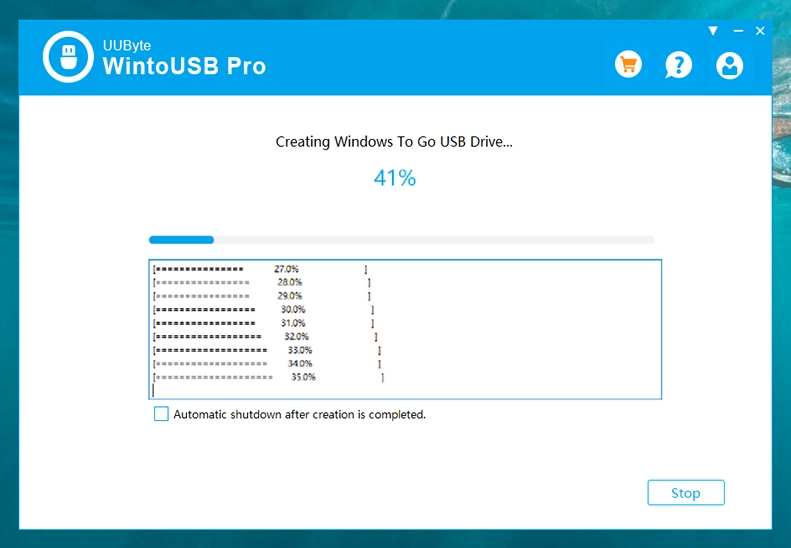
Step 6: Click the Start button to write files and folders to target external drive. And you have to wait about 10 minutes before the task is completed.
How to Clone Existing Windows OS to USB as Bootable
This feature allows the user cloning the existing Windows OS from system drive to an external drive. All the settings and drivers will be copied to target drive as well as the core OS. This is a more suitable choice if you want to different instances of the same configuration and user preferences.
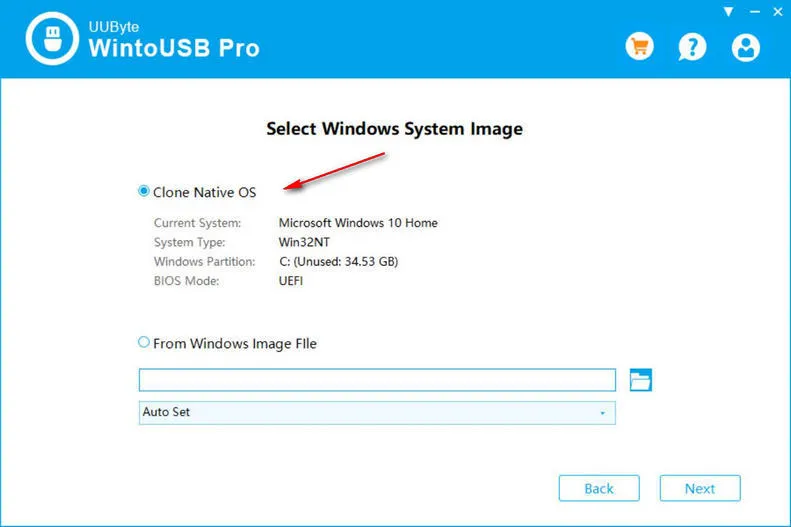
The procedure is almost the same as above part. The only different is that you have to choose Clone Native System in Select Windows System Image section. The rest of steps are the same as we described in above tutorial.
Summary:
UUByte WintoUSB Pro is built on a clean and intuitive UI. This will reduce the hurdle in using this program. So it is easy to get started. If you already read the full tutorial and still had issue, please contact our professional support team instead. They are glad to help!