UUByte DMG Editor is one of best tools for creating macOS and Linux bootable USB on a Windows PC or Mac. The process is simple enough! Just download a macOS DMG file or Linux ISO file from UUByte.com and burn it to USB drive. After that, a macOS/Linux USB installer is ready for use.
P.S. The screenshots are taken from a Windows 11 PC. The steps are the same if you are using a Mac. Now, download and install UUByte DMG Editor on your computer first!


How to Create macOS Bootable USB on Windows PC or Mac
Step 1: To make a macOS bootable USB , please download a copy of macOS dmg file first from the following link. Don't use the dmg file downloaded from Apple as it does not work!
https://www.uubyte.com/online-help/where-to-download-macos-dmg-file.html
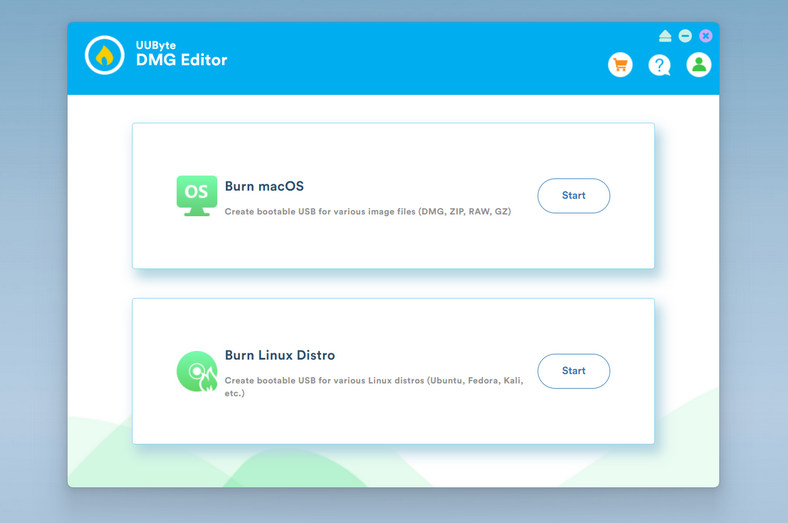
Step 2: Open the DMG Editor from your PC or Mac. You will see the user interface as the following screenshot.
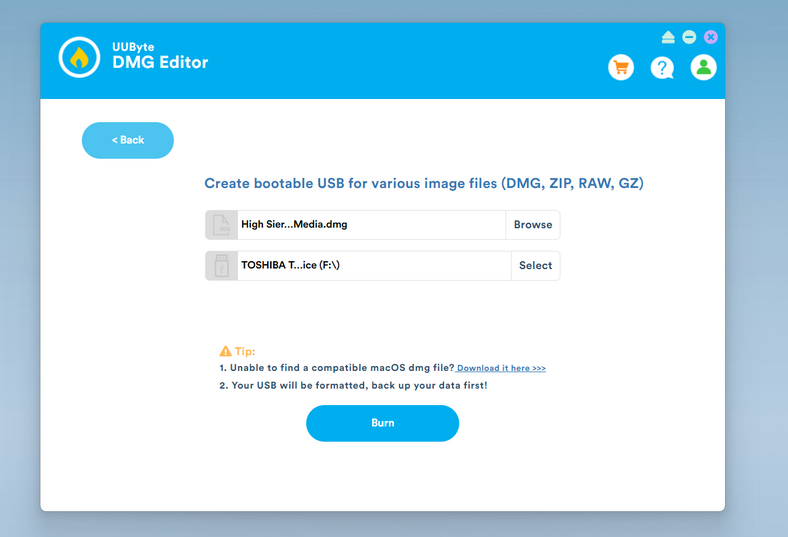
Step 3: Click the Burn macOS menu from the home screen and you will be lead to a new window. From there, add the dmg file by clicking the Browse button and select the USB drive name from the list. After that, click the "Burn" button again to start the process.
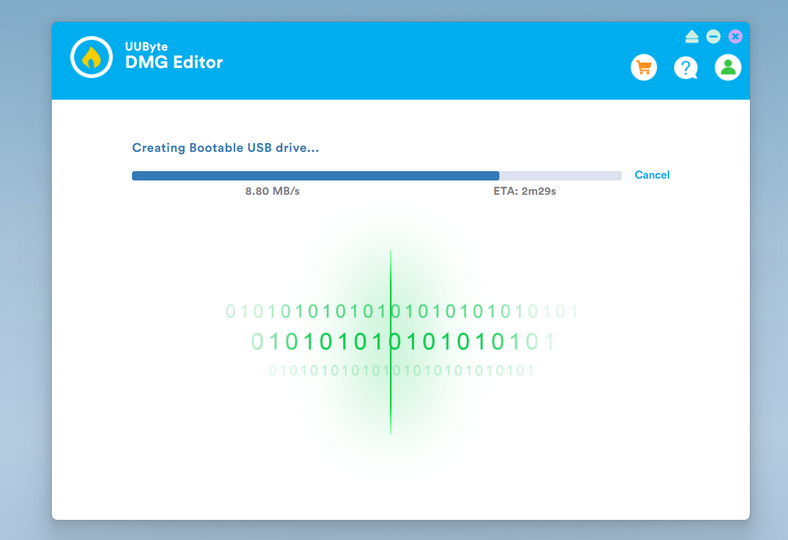
Step 4: You will see a progress bard indicating the whole burning process. Usually, it takes less than 10 minutes with a fast USB 3.0 drive.
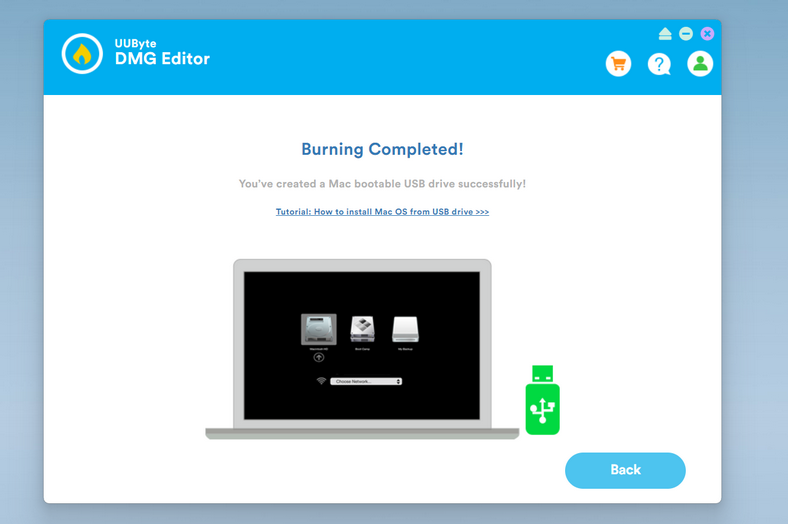
Step 5: When the burning task is done, you will see the instructions on how to boot your Mac from this USB drive so you can start installing macOS on your Mac now.
How to Create Linux Bootable USB on Windows PC or Mac
Besides creating macOS bootable USB, UUByte DMG Editor is also capable of making Linux bootable USB on a PC or Mac. Currently, it supports all Linux distributions, such as Ubuntu, Debian, Fedora, Linux Mint, Kali, etc...
Step 1: Download the ISO image file from the official websites.
Step 2: Open the DMG Editor from your PC or Mac. You will see the user interface as the following screenshot.
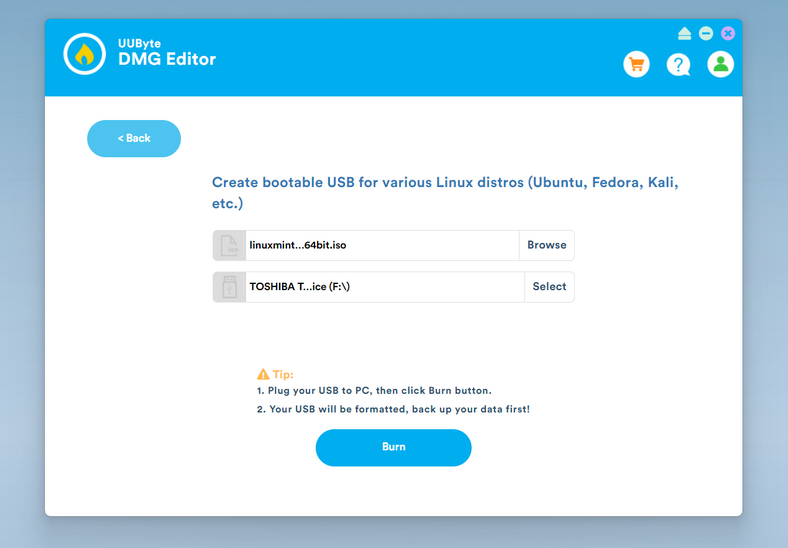
Step 3: Click the Burn Linux Distro menu from the home screen and you will be lead to a new window. From there, add the Linux ISO by clicking the Browse button and select the USB drive name from the list. After that, click the "Burn" button again to start the process.
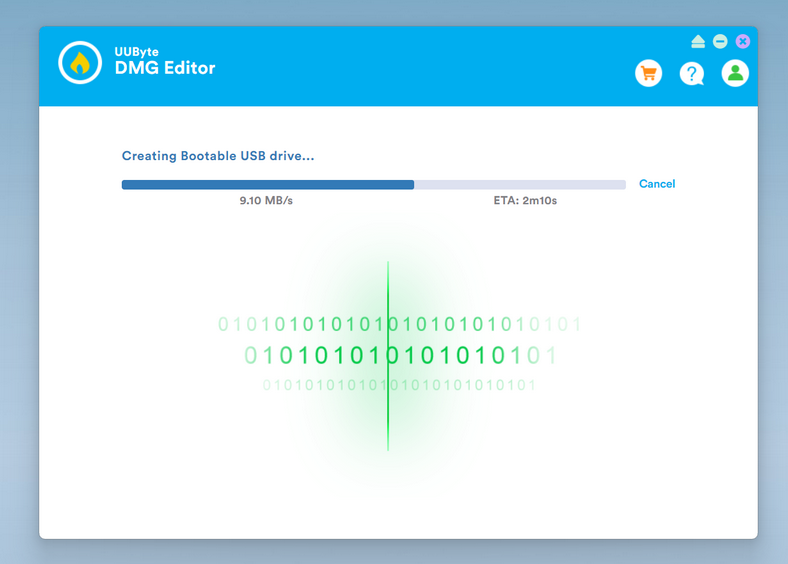
Step 4: You will see a progress bard indicating the whole burning process. Usually, it takes less than 10 minutes with a fast USB 3.0 drive.
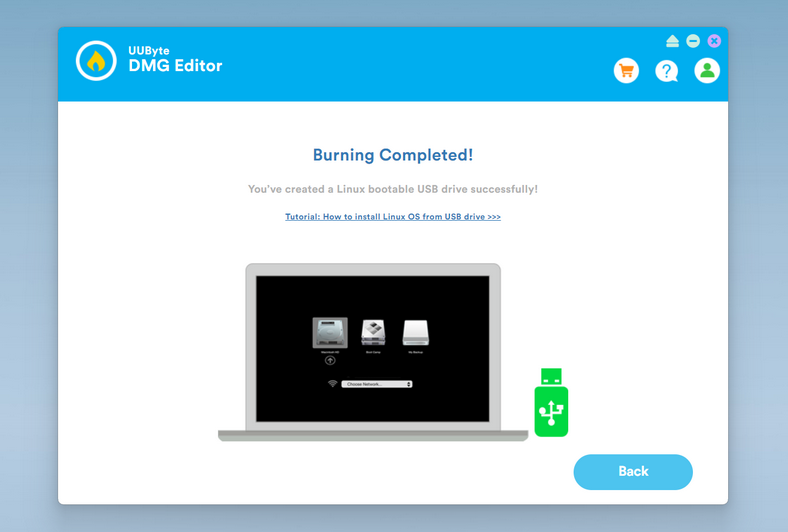
Step 5: When the burning task is done, you will see the instructions on how to boot your computer from this USB drive so you can start installing Linux on the computer now!.
Summary:
If you had problem in using UUByte DMG Editor, please check out the FAQ page first. You should find common issues from there. You can also contact our support team if the problem still exists.